
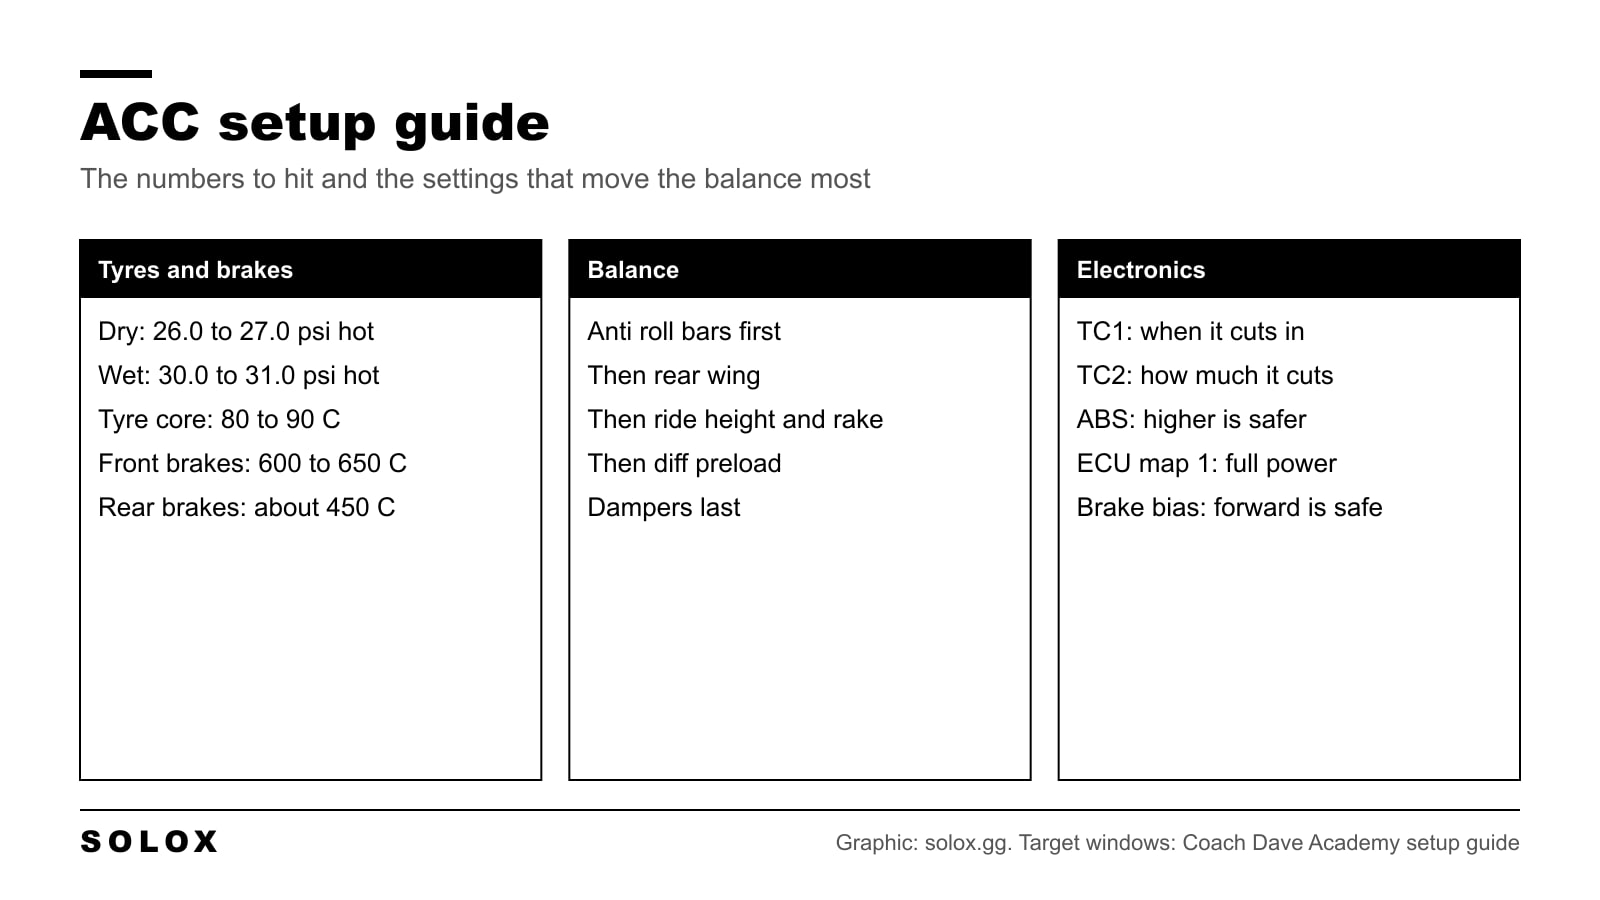
A setup in ACC is worth less than people think and more than they use. The aggressive preset gets you most of the way. The rest is tyre pressures, electronics and a few clicks of balance, in that order.
This page is every tab of the setup screen, what each setting does to the car, and the order I would work in. It is the same order a real GT3 engineer works in: tyres in the window first, then balance, then the details.
If you want to see it applied to one circuit, corner by corner, read my ACC Monza GT3 setup guide.
The numbers to hit
Before anything else, these are the windows. If the car is outside them, no clever damper setting will save it.
| What | Target | If you are outside it |
|---|---|---|
| Hot tyre pressure, dry | 26.0 to 27.0 psi | Lower the cold pressure if you run above, raise it if you run below |
| Hot tyre pressure, wet | 30.0 to 31.0 psi | Same method, on the wet tyre |
| Tyre core temperature | 80 to 90°C | Under 70°C the tyre grains, over 100°C it blisters |
| Inside to outside spread, front | About 9°C at most | More than that means too much camber |
| Inside to outside spread, rear | About 5°C at most | More than that means too much camber |
| Front brake temperature | 600 to 650°C | Open or close the front ducts |
| Rear brake temperature | About 450°C | Open or close the rear ducts |
You read all of these on the setup screen after a run, and live on the tyre widget in the HUD.
The order to work in
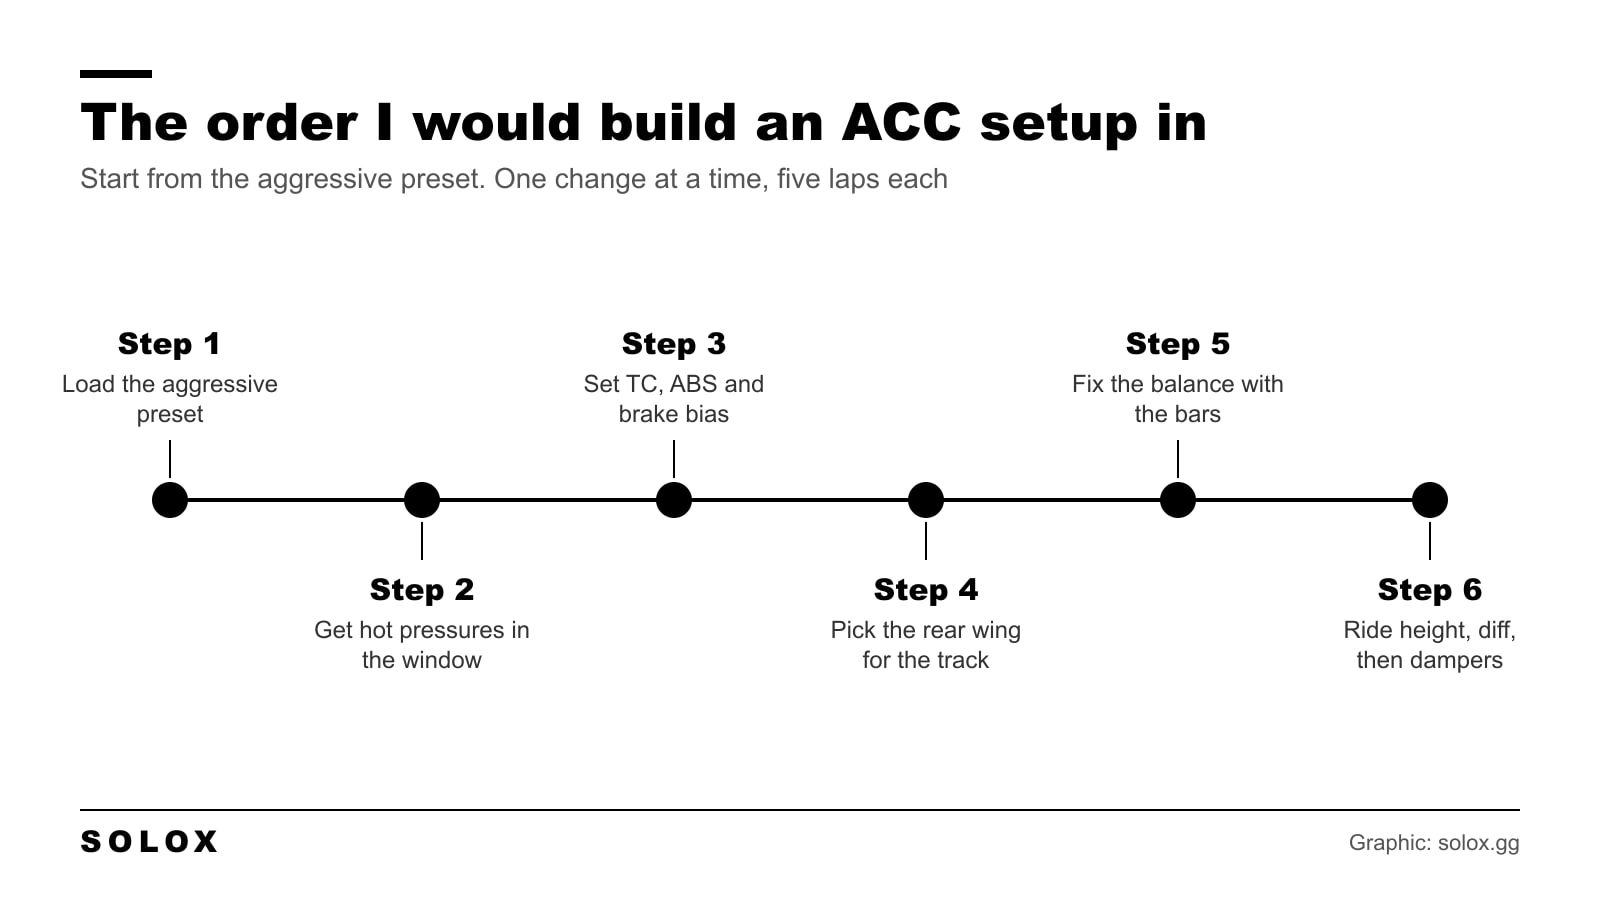
The rule under all of it: one change at a time, five laps each. If you change the wing, the bars and the pressures together and the car is better, you do not know why. If it is worse, you do not know why either.
And be honest about your own laps. If your times move by half a second from lap to lap, a click of anti roll bar is not what you are missing. Drive first. Then set up.
What is on each tab
| Tab | What is on it | How much lap time is in it |
|---|---|---|
| Tyres | Pressures, toe, camber, caster | A lot. Pressures are the biggest single thing in ACC |
| Electronics | TC1, TC2, ABS, ECU map, telemetry laps | A lot, and it costs you nothing to try |
| Fuel and Strategy | Fuel load, tyre set, brake pads, pit strategies | Race result more than lap time |
| Mechanical Grip | Anti roll bars, brake bias, steering ratio, wheel rates, bumpstops, diff preload | The main balance tools |
| Dampers | Bump, fast bump, rebound, fast rebound per wheel | Small. Leave it until the rest is right |
| Aero | Ride height, splitter, rear wing, brake ducts | A lot at fast tracks |
Tyres
Pressures
This is the big one. The tyre in ACC has a narrow pressure window, and the grip falls away on both sides of it.
- Dry: 26.0 to 27.0 psi hot.
- Wet: 30.0 to 31.0 psi hot.
Hot means after four or five clean laps, not out of the pits. The number in the setup screen is the cold pressure, so you set cold and you check hot. If the fronts come back at 27.8, take about a psi out of the front cold pressure and go again.
Pressures move with the weather. A setup that hit the window at 22°C air will be over it at 30°C. Check every session. The full method is in the ACC tyre pressure guide, and how the track itself changes things is in the track temperature guide.
Camber
Camber is how far the top of the tyre leans in. More negative camber gives more grip in the corner and less in a straight line, under braking and on traction.
Do not just max it. Read the tyre temperatures across the tread after a run. The inside will be hotter than the outside, and that is fine up to a point: about 9°C at the front and about 5°C at the rear. More spread than that and the tyre is running on its inside edge. Take some camber out.
Toe
Toe is the angle of the wheels seen from above.
- Front toe out (negative) makes the car turn in sharper. Too much and it wanders on the straight and heats the fronts.
- Rear toe in (positive) makes the rear stable on throttle. Less rear toe gives more rotation and a rear that moves around more.
The aggressive preset is already close. I would move toe in small steps and only to fix a clear problem, like a car that will not turn in at slow corners.
Caster
More caster gives more camber as you steer and a heavier wheel. The simple rule: run it high, and bring it down only if the car starts to understeer in fast corners. Remember that caster changes the weight of your force feedback, so do not confuse a heavier wheel with more grip.
For how all of this wears the tyre over a stint, read the ACC tyre wear guide.
Electronics
These are the cheapest lap time in the game. You can change them from the wheel while you drive, so there is no excuse for not testing them.
TC1 and TC2
A higher number is more help. That is true for both. People get it backwards all the time.
- TC1 sets how much wheelspin the system allows before it steps in.
- TC2 sets how hard it cuts the power once it does. Not every car has it.
Start from the preset values. Go down one click at a time until the rear starts to cost you more than it gives. Keep TC1 and TC2 within a click of each other. In the wet, go up two or three clicks on both. The detail is in TC1 vs TC2 in ACC.
ABS
Higher ABS is more stable and easier on the tyres, but the braking zone gets longer. Lower ABS stops the car shorter if your foot is good enough. If you lock a front at the end of every zone, go up a click. That is not a weakness. A flat spotted tyre is slower than a click of ABS.
ECU map
The engine map sets power, fuel use and how the throttle responds.
- Map 1 is full power and the highest fuel use on every car. Use it for qualifying and sprint races.
- The other dry maps give less power for less fuel, or a softer throttle. They are for saving fuel in a long race or behind the safety car.
- The wet maps make the throttle more progressive, which is what you want in the rain.
The number of maps and what each one does is different for every car, so check your car before a race that needs fuel saving.
Telemetry laps
Set it to 10 and forget it. It makes the game log your laps for MoTeC, which is how you check everything on this page with data. The steps are in the ACC MoTeC guide.
Fuel and strategy
Fuel is weight, and weight is lap time. For qualifying, run the minimum that gets you an out lap, two push laps and an in lap. For the race, the setup screen shows your fuel per lap after a few laps. Multiply by the race laps and add one lap of margin.
Brake pads
| Pad | What it is for | When I would run it |
|---|---|---|
| Pad 1 | Most bite, wears fastest | Hotlaps, qualifying and GT3 sprint races under two hours |
| Pad 2 | A bit less bite, lasts much longer | Endurance races and GT4 races |
| Pad 3 | Softest bite, easy to modulate | Wet races, with pad 2 as the other option |
Pad 1 in a long race is the classic mistake. It feels great for an hour and then the pedal goes long because there is no pad left.
Mechanical grip
This tab is where you fix the balance. If you only learn one tab properly, make it this one.
Anti roll bars
The first tool for balance, every time. The end of the car you soften gets more grip.
- Softer front bar: less understeer on entry.
- Stiffer front bar: less oversteer on entry, sharper response.
- Softer rear bar: less oversteer on exit, better traction.
- Stiffer rear bar: less understeer on exit, more rotation.
One click is enough to feel. Softer bars also help the car ride kerbs, which matters a lot at tracks like Monza.
Brake bias
More forward is stable and safe, with more understeer into the corner. More rearward helps the car rotate on the brakes, and at some point the rear comes round on you. Move it in steps of 0.5%.
Bias is on a button for a reason. As the fuel burns off and the tyres go, the right value moves. I would map it to the wheel and use it during the race. The technique side is in the ACC braking guide.
Differential preload
Lower preload makes the car more agile and helps it rotate on entry. Higher preload makes it stable on entry and pushes the rear wide on exit when you get on the power. If the car feels lazy in slow corners, try lower.
Wheel rates and bumpstops
Wheel rate is spring stiffness. Softer gives more mechanical grip and a car that moves around more. Stiffer keeps the car flat, which the aero likes, and makes it nervous over bumps and kerbs.
Bumpstops are the stops the suspension hits at the end of its travel. Rate is how hard they are, range is how much travel you have before you hit them. They matter most at tracks with big compressions. I would leave both at the preset until the rest of the car is done.
Steering ratio
This one is feel, not grip. A lower number is a quicker rack. Set it so the tightest corner on the track needs about a quarter turn more than you would like, not arms crossed.
Dampers
Dampers control how fast the suspension moves, not how far. There are four settings per wheel.
- Bump: how the wheel compresses in slow movements, like braking and turn in.
- Rebound: how it extends again in slow movements.
- Fast bump and fast rebound: the same, for sharp hits like kerbs and bumps.
The honest advice: leave them. The aggressive preset dampers are good. If the car is unsettled over kerbs, soften fast bump a click or two at that end. Past that, you need data to know what you are doing, and the Suspension Histogram in MoTeC is the tool. Most drivers who are slow do not have a damper problem.
Aero
Rear wing
More wing gives more rear grip in fast corners and more drag on the straight. It also shifts the balance toward understeer, because the rear now has more grip than the front.
Pick it for the track. Low at Monza. High at tracks with long fast corners. One click is a real change in ACC.
Ride height and rake
Lower is more downforce and less drag, until the car hits the ground. Then it is a disaster. Rake is the rear sitting higher than the front. More rake moves the aero balance forward: more rotation in fast corners, less stability.
If you add rear wing and the car now understeers in fast corners, a little more rear ride height brings the front back.
Splitter
Only some cars have an adjustable splitter. More splitter gives more front downforce and moves the car toward oversteer in fast corners.
Brake ducts
Higher numbers are more cooling and a little more drag. Set them from the brake temperatures: 600 to 650°C at the front and about 450°C at the rear. At fast tracks with few big stops you can close them a step. The ducts also put heat into the tyres, so a duct change can move your pressures. Check them again.
The full picture is in the ACC aerodynamics guide.
Balance cheat sheet
| Setting | Change | What the car does |
|---|---|---|
| Front anti roll bar | Softer | Less understeer on entry, more front grip |
| Front anti roll bar | Stiffer | Less oversteer on entry, sharper response |
| Rear anti roll bar | Softer | Less oversteer on exit, better traction |
| Rear anti roll bar | Stiffer | Less understeer on exit, more rotation |
| Rear wing | More | More rear grip in fast corners, more understeer, more drag |
| Splitter | More | More front grip in fast corners, more oversteer |
| Rear ride height | Higher | More rake, more rotation in fast corners |
| Diff preload | Lower | More agile, more rotation on entry |
| Diff preload | Higher | More stable on entry, more oversteer on exit |
| Brake bias | Forward | Stable under braking, more understeer into the corner |
| Brake bias | Rearward | More rotation on entry, less stable |
Fixing a problem
Find where in the corner it happens first. Entry, middle or exit. Slow corner or fast corner. Then use the table.
| Problem | First thing I would try | Second thing |
|---|---|---|
| Understeer on entry | Soften the front anti roll bar | Move the brake bias rearward by 0.5% |
| Understeer mid corner, slow corners | Soften the front anti roll bar | Lower the diff preload |
| Understeer in fast corners | Less rear wing, one click | Raise the rear ride height a little |
| Oversteer on entry | Brake bias forward by 0.5% | Stiffen the front anti roll bar |
| Oversteer on exit | One more click of TC1 | Soften the rear anti roll bar |
| Oversteer in fast corners | More rear wing, one click | Lower the rear ride height a little |
| Car bounces over kerbs | Soften the anti roll bars | Raise the ride height |
| Fronts lock at the end of the zone | One more click of ABS | Brake bias rearward by 0.5% |
If it only happens at one corner, it is probably your line or your braking, not the car. The longer version of this is the understeer and oversteer guide.
Qualifying setup against race setup
They are not the same car.
- Qualifying: low fuel, pad 1, map 1, TC a click lower, pressures set for a two lap run. The car can be a bit sharp because you only need it for two laps.
- Race: full fuel changes the ride height and the balance, so test on race fuel. Pressures set for lap five, not lap two. TC and ABS where you can live with them when the tyres are old. A calm rear end is worth more than a tenth.
I would always give up a little peak pace for a car I can place every lap. Races are lost with mistakes, not with a tenth of setup.
Wet setup
Rain needs its own setup, not just wet tyres on the dry car. The short version: 30.0 to 31.0 psi hot, more wing, softer bars, higher ride height, TC and ABS up two or three clicks, a wet engine map, and the brake ducts closed a step or two to keep heat in. All of it is in the ACC wet weather guide.
Does the car matter?
Yes. A mid engined car rotates on its own and needs calming down. A front engined car is stable and needs help to turn. The same click does different things in each. If you have not picked one yet, read how to choose your car in ACC before you spend hours on a setup for the wrong one.
FAQ
What is the best tyre pressure in ACC?
Aim for 26.0 to 27.0 psi hot on dry tyres and 30.0 to 31.0 psi hot on wets. Hot means after four or five clean laps. Adjust the cold pressure in the setup until the hot pressure lands in that window.
Should I use the safe or the aggressive preset in ACC?
The aggressive preset. It is faster and it is the base for nearly every good setup. The safe preset is fine for learning a track, but it understeers and it is slow in a straight line.
What should I change first in an ACC setup?
Tyre pressures, then traction control and ABS, then the rear wing for the track, then the anti roll bars for balance. Leave dampers until last.
How do I fix understeer in ACC?
Soften the front anti roll bar first. In fast corners, take a click of rear wing off or raise the rear ride height a little. In slow corners, lower the diff preload.
How do I fix oversteer in ACC?
On exit, add a click of TC1 or soften the rear anti roll bar. On entry, move the brake bias forward by 0.5%. In fast corners, add a click of rear wing.
Is a higher TC number more or less traction control in ACC?
More. A higher number on TC1 or TC2 means the system helps you more. Zero on TC1 turns it off.
Which brake pads should I use in ACC?
Pad 1 for qualifying and GT3 sprint races under two hours. Pad 2 for endurance races and for GT4. Pad 2 or 3 in the wet.