Setups
F1 2019 USA Setup: COTA Austin Car Setup
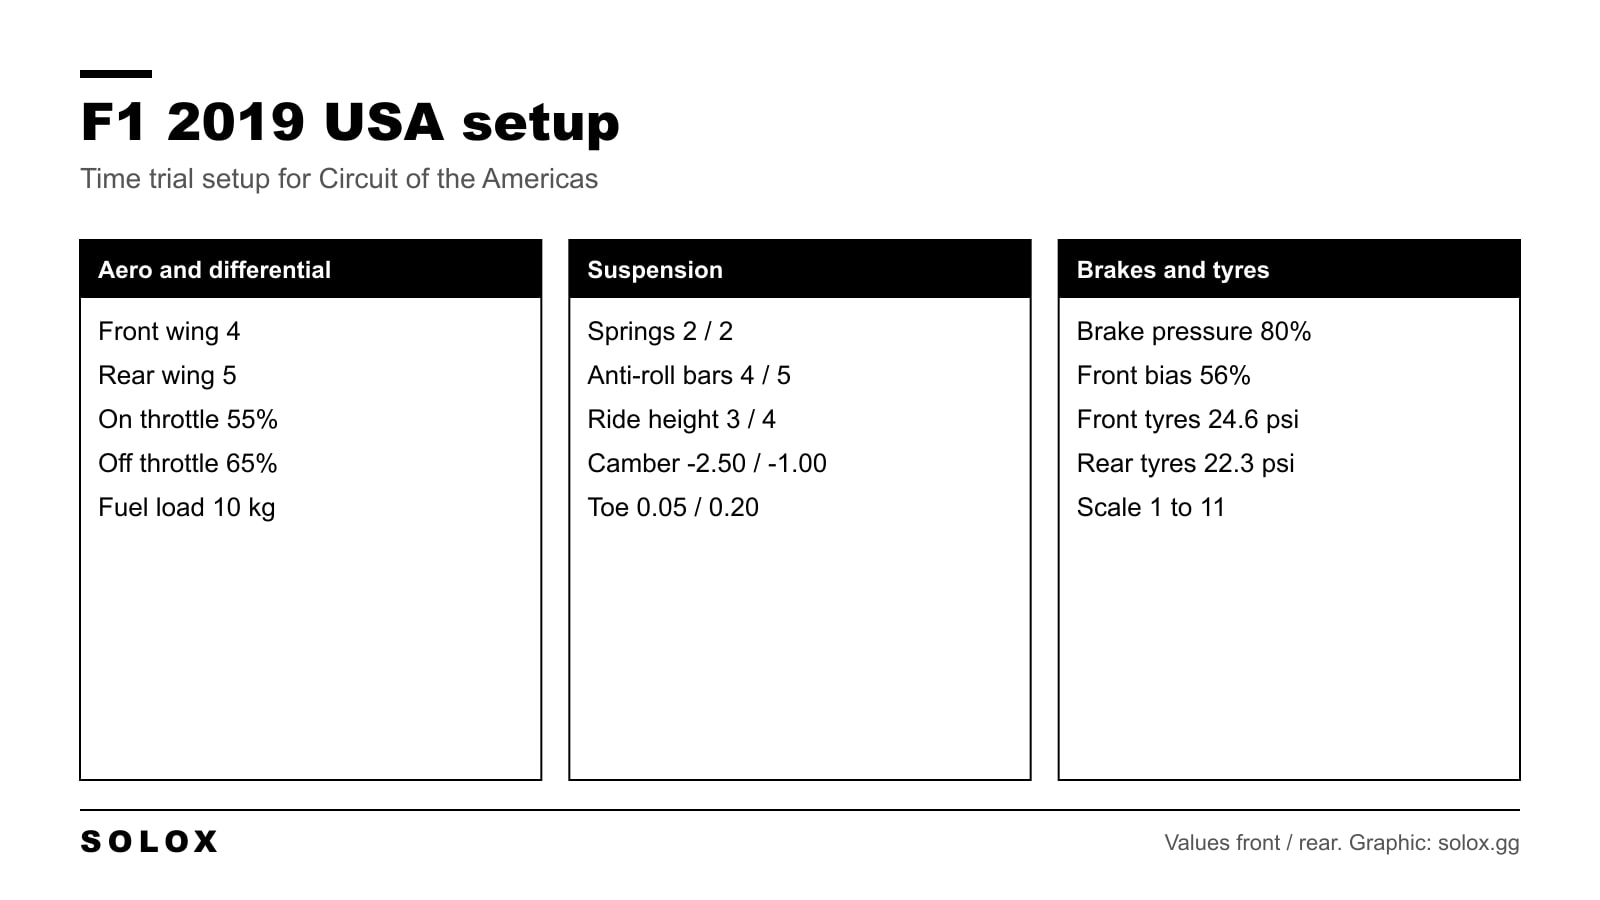
My F1 2019 USA setup for COTA in Austin: wings 4 and 5, differential, suspension, brakes and tyre pressures in one table, plus what to change for a race.

Car setups for ACC, iRacing, NASCAR Heat 5 and F1 games, built and tested on track.
My F1 2019 USA setup for COTA in Austin: wings 4 and 5, differential, suspension, brakes and tyre pressures in one table, plus what to change for a race.
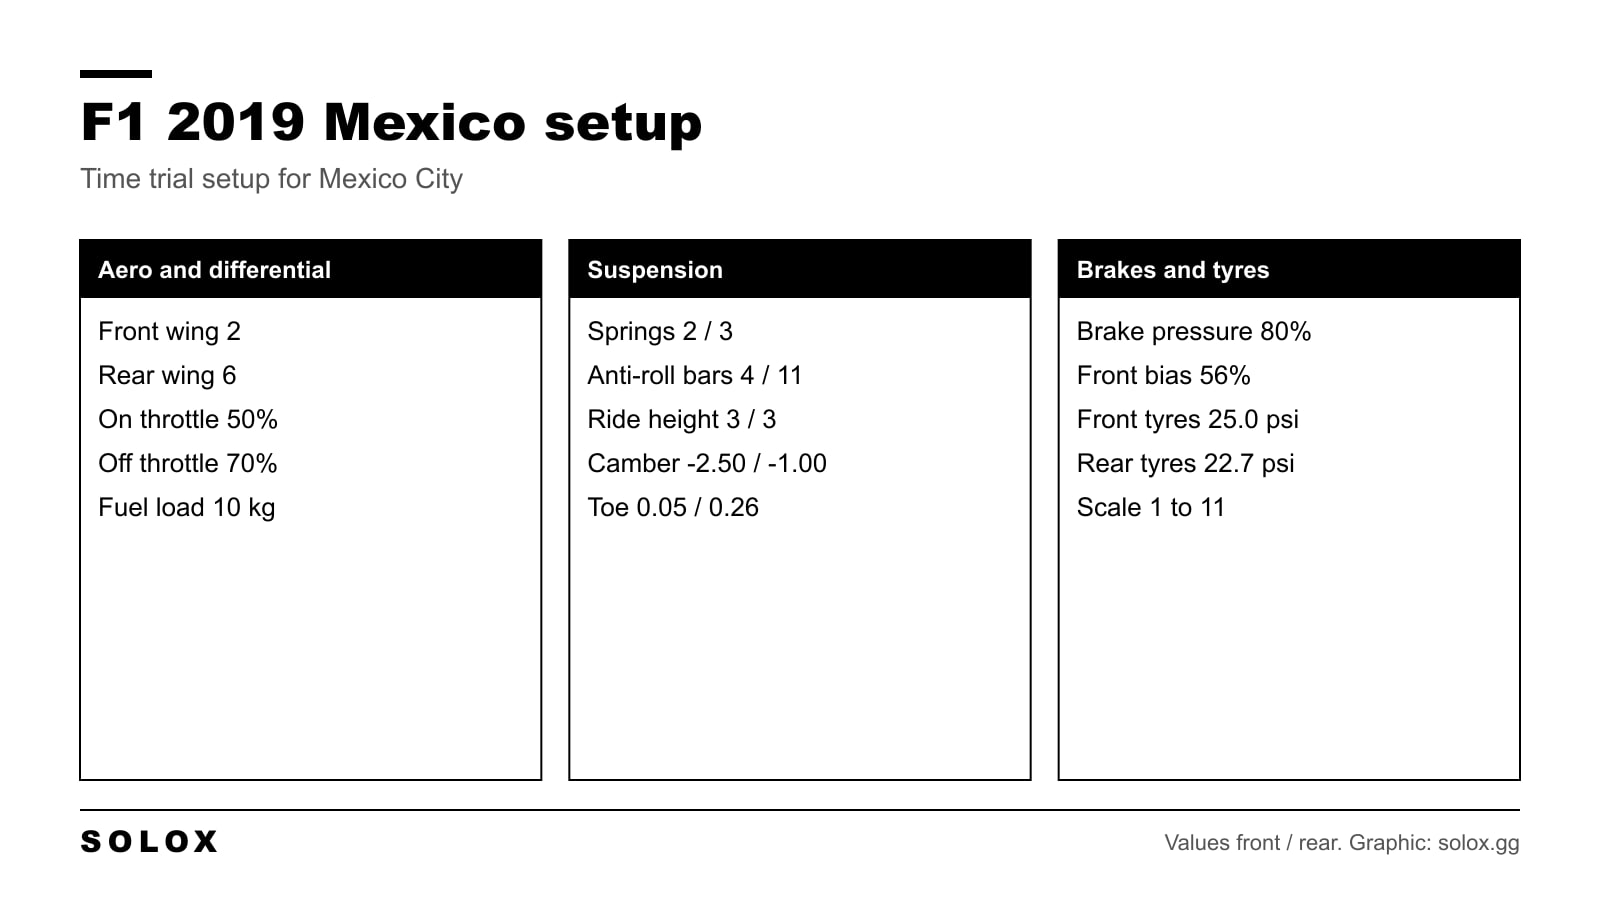
My F1 2019 Mexico setup: wings 2 and 6, differential, suspension, brakes and tyre pressures in one table, plus what I would change for a race in Mexico City.
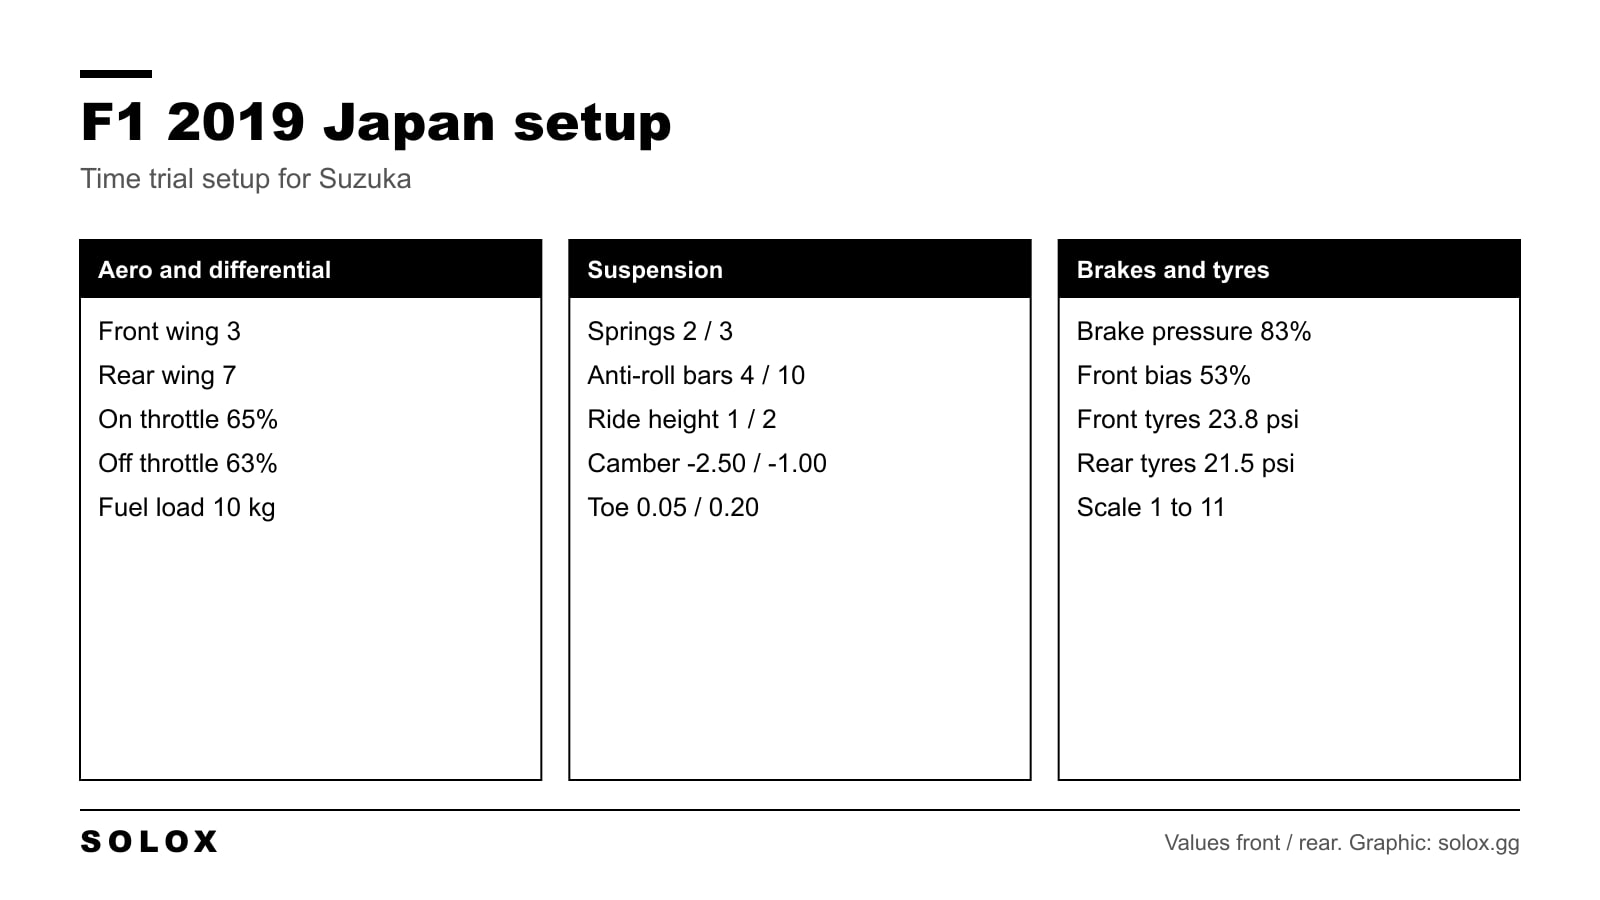
My F1 2019 Japan setup for Suzuka: wings 3 and 7, differential, suspension, brakes and tyre pressures in one table, plus what to change for a race.
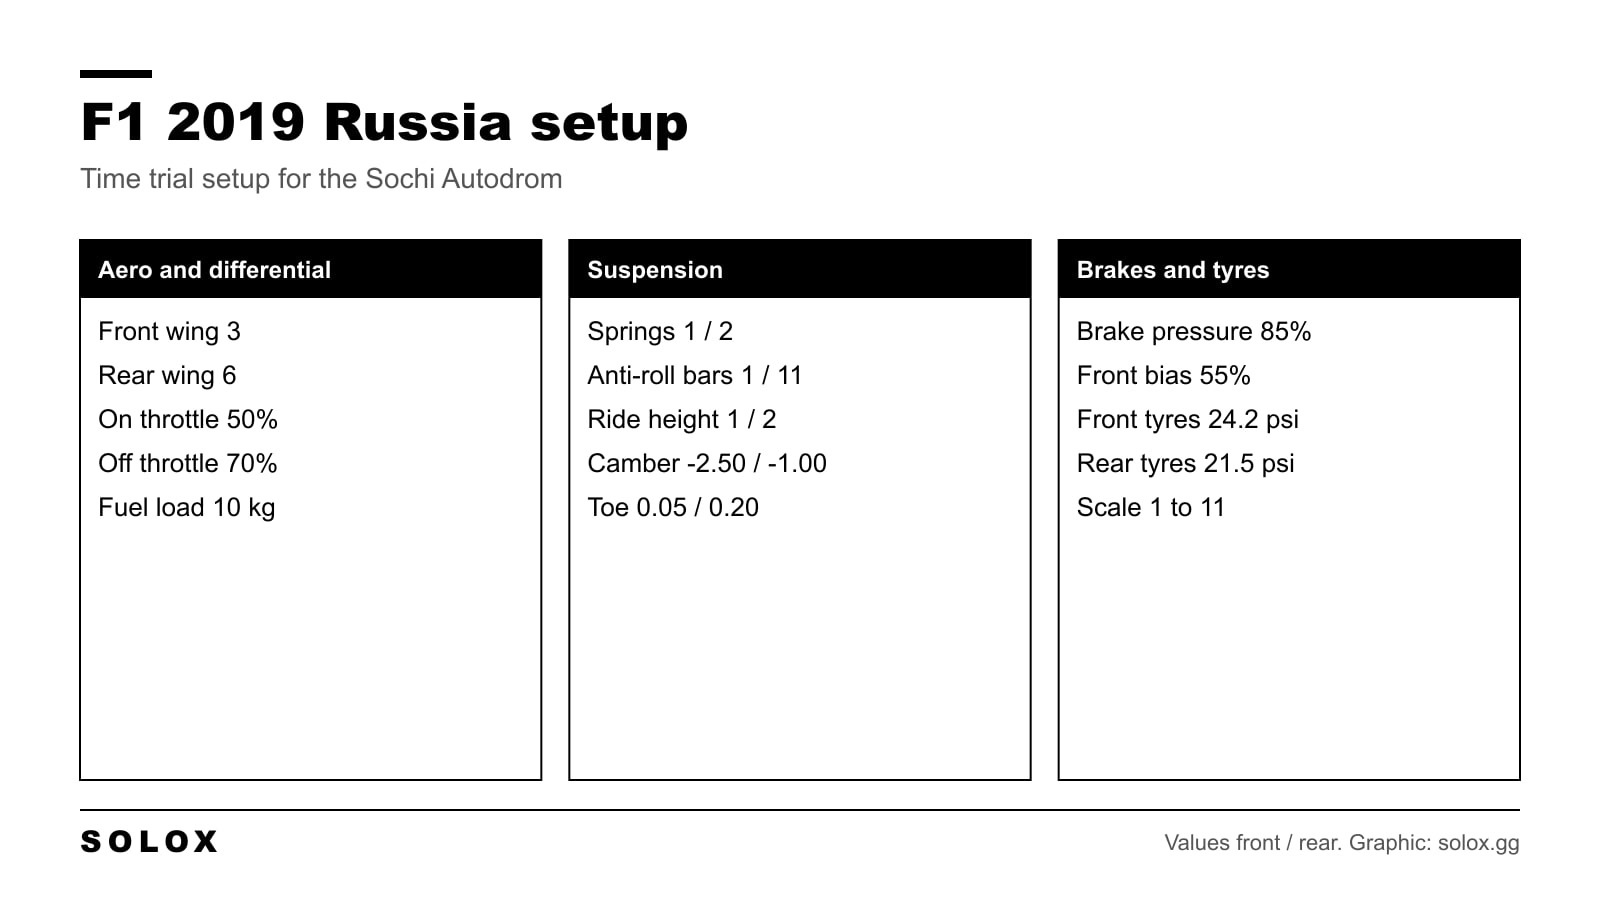
My F1 2019 Russia setup for Sochi: wings 3 and 6, differential, suspension, brakes and tyre pressures in one table, plus what to change for a race.
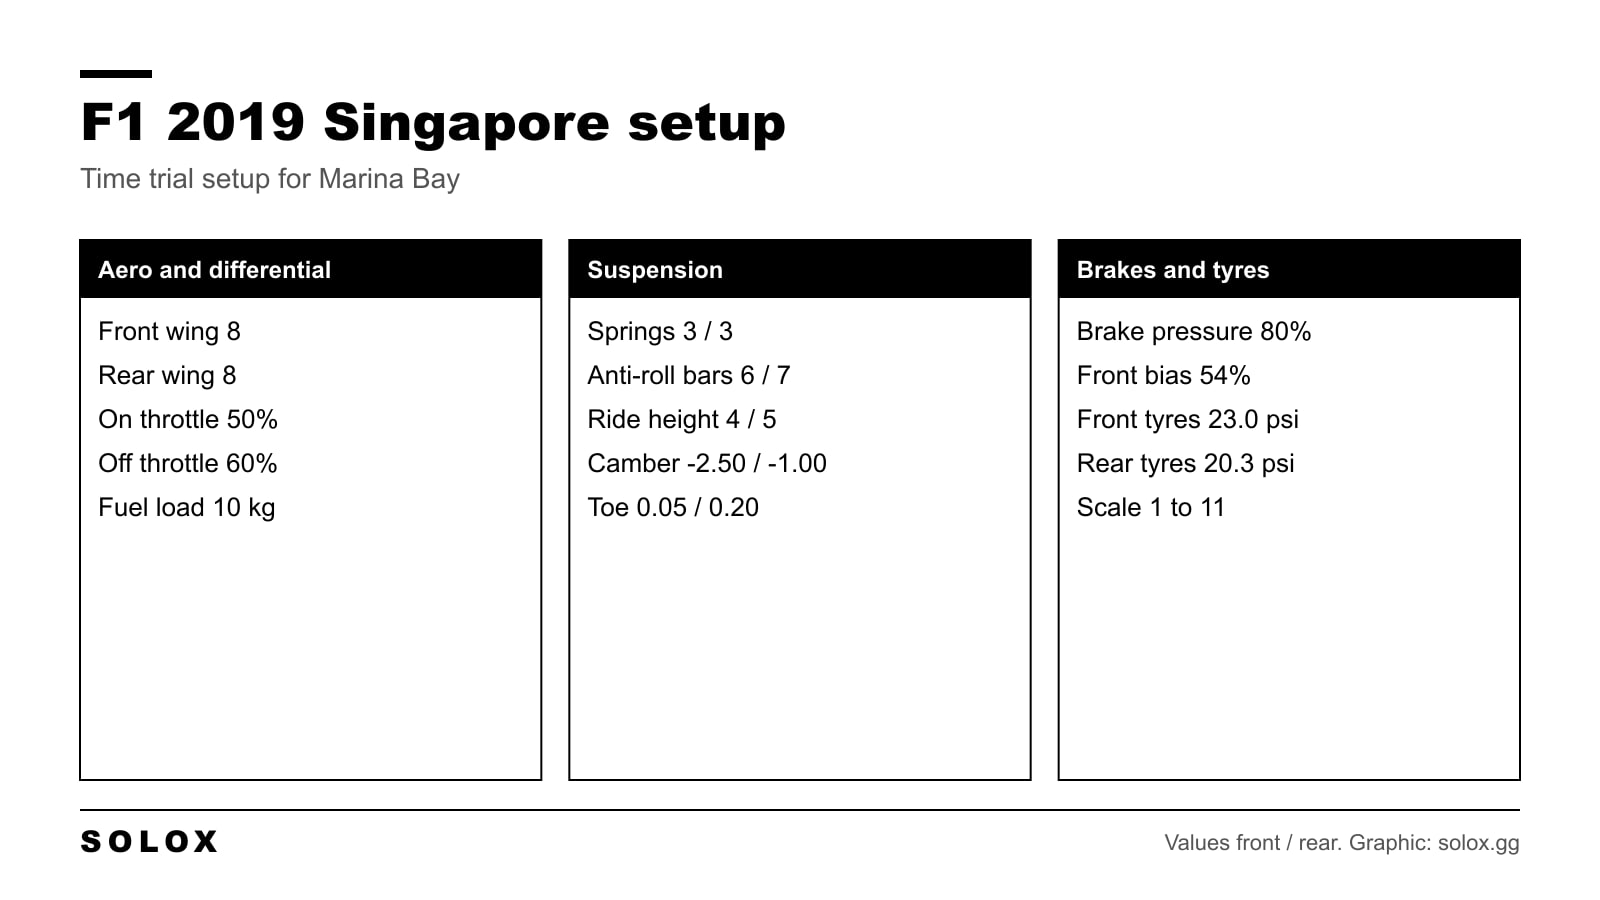
My F1 2019 Singapore setup for Marina Bay: wings 8 and 8, differential, suspension, brakes and tyre pressures in one table, plus what to change for a race.
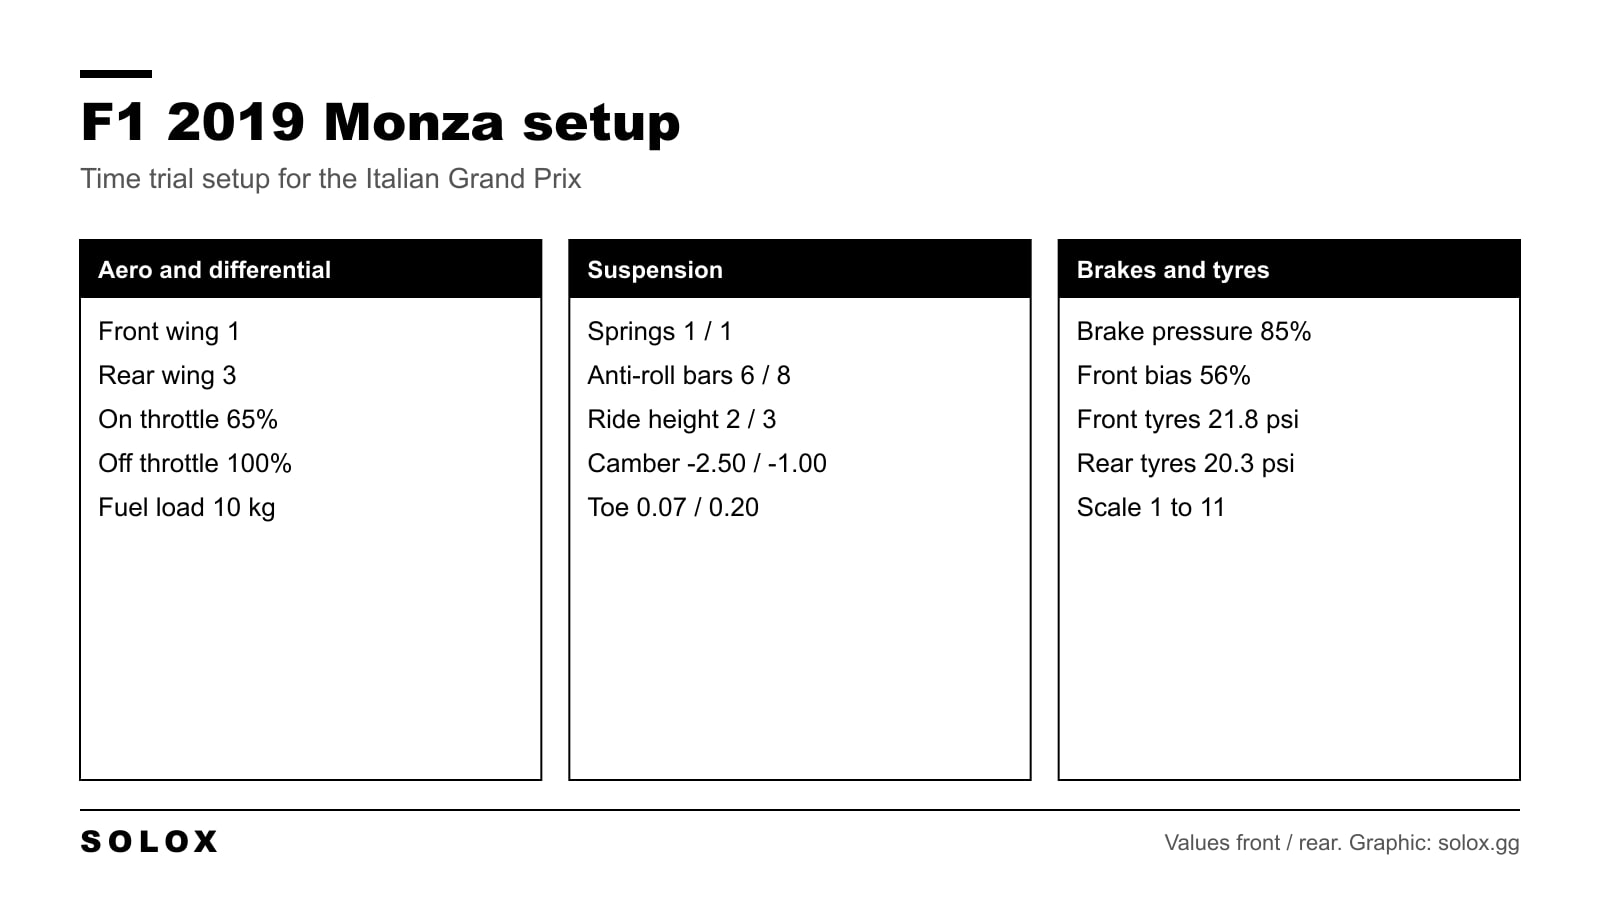
My F1 2019 Monza setup for the Italian GP: wings 1 and 3, differential, suspension, brakes and tyre pressures in one table, plus what to change for a race.
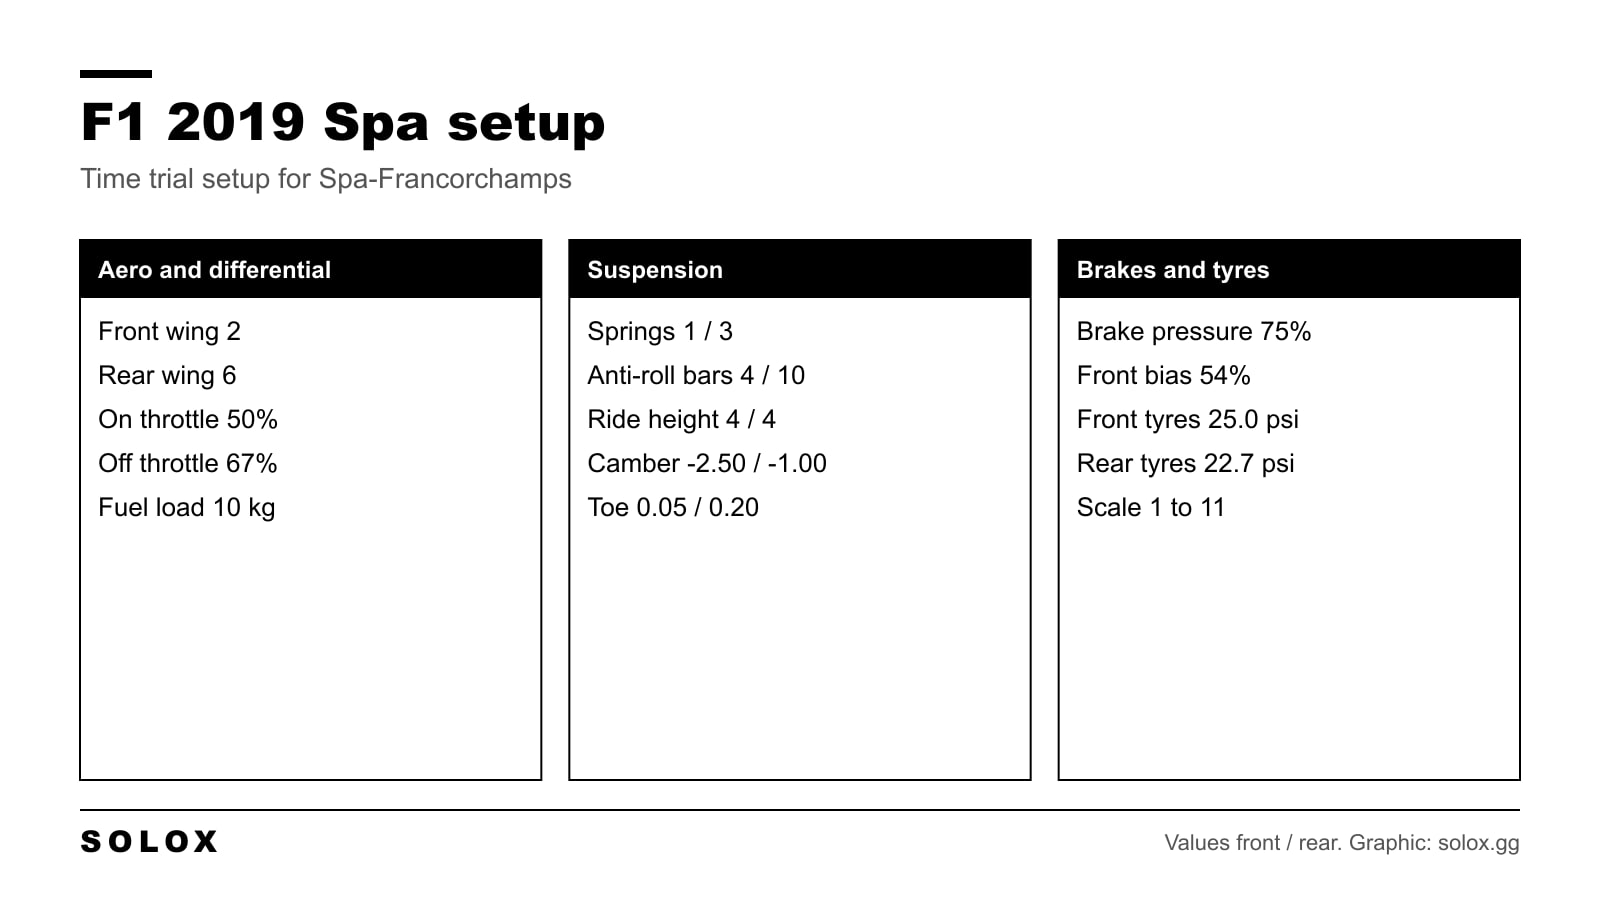
My F1 2019 Spa setup for the Belgian GP: wings 2 and 6, differential, suspension, brakes and tyre pressures in one table, plus what to change for a race.
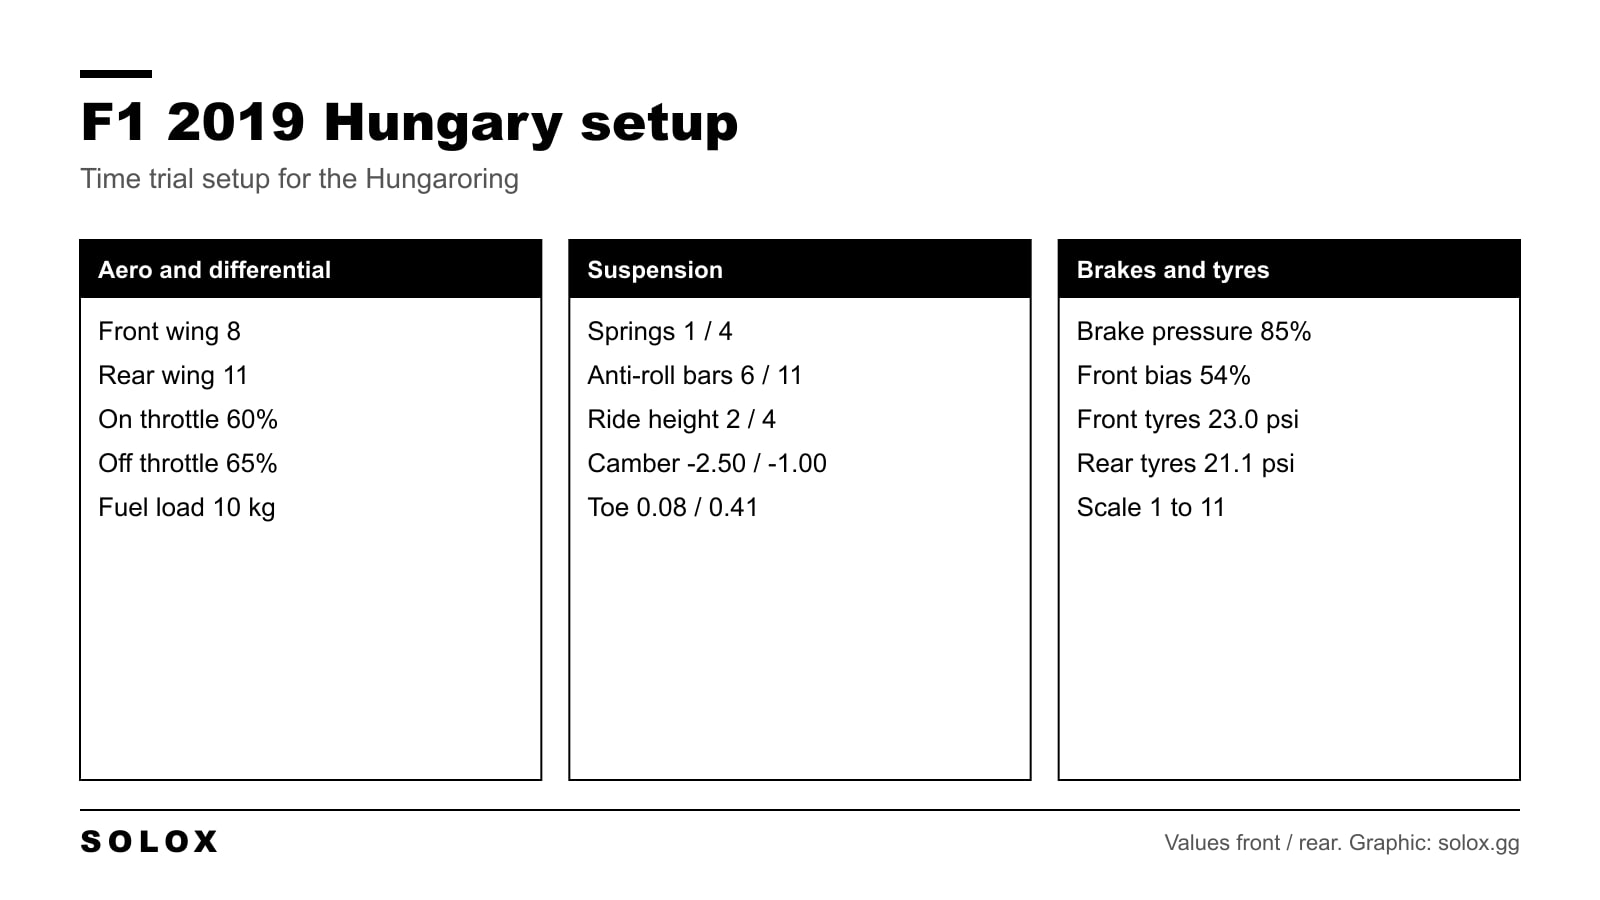
My F1 2019 Hungary setup for the Hungaroring: wings 8 and 11, differential, suspension, brakes and tyre pressures in one table, plus race changes.
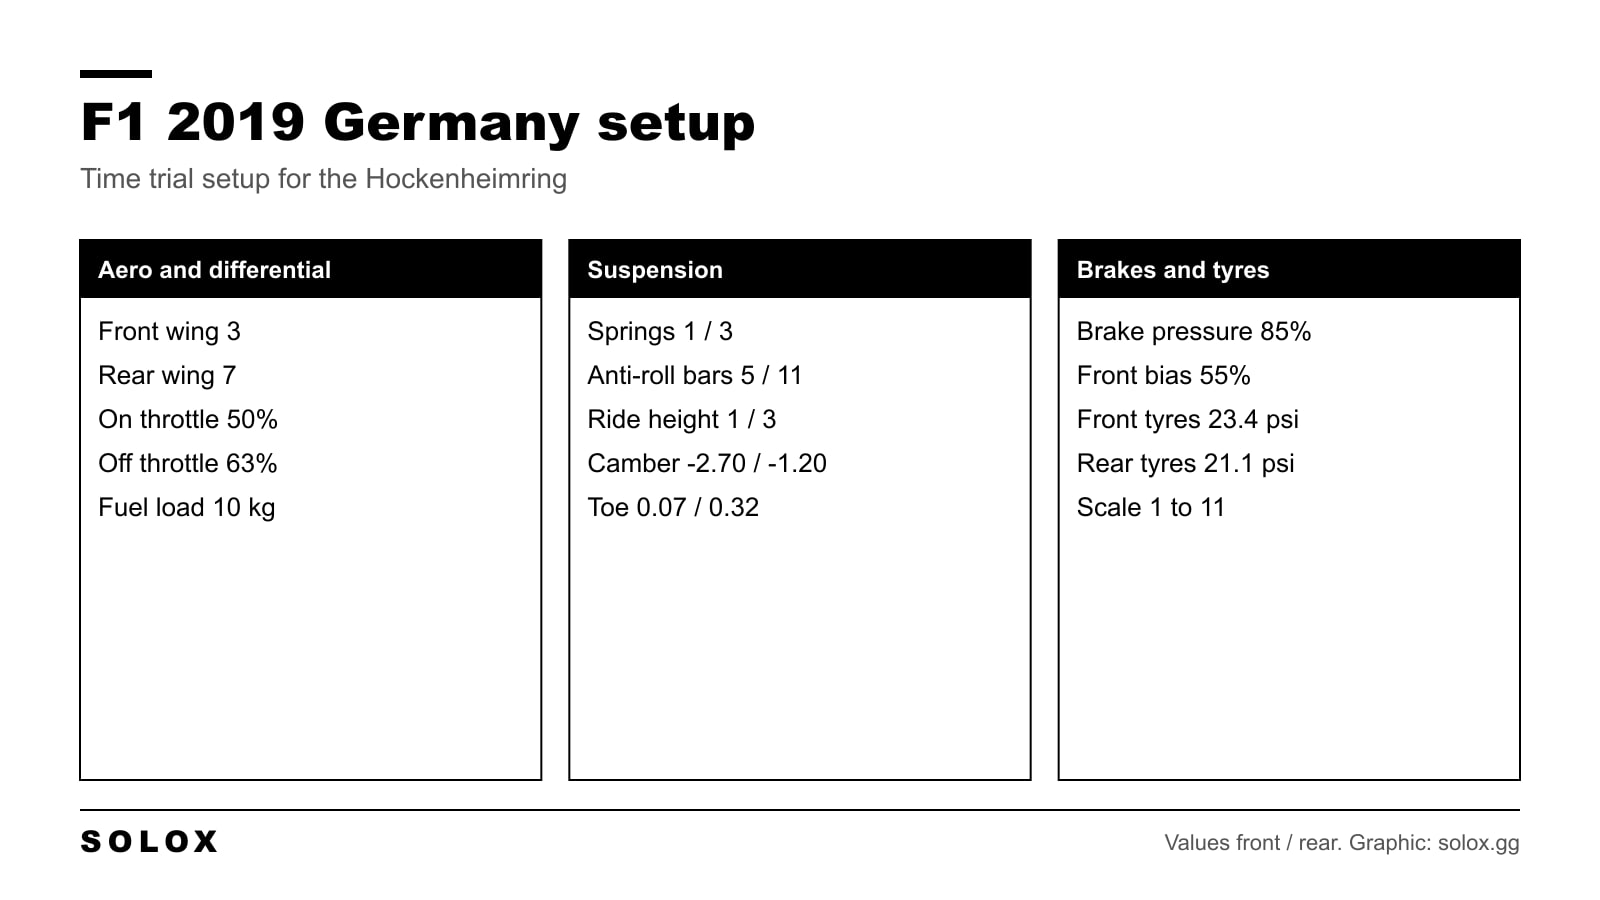
My F1 2019 Germany setup for Hockenheim: wings 3 and 7, an open differential, suspension, brakes and tyre pressures in one table, plus race changes.
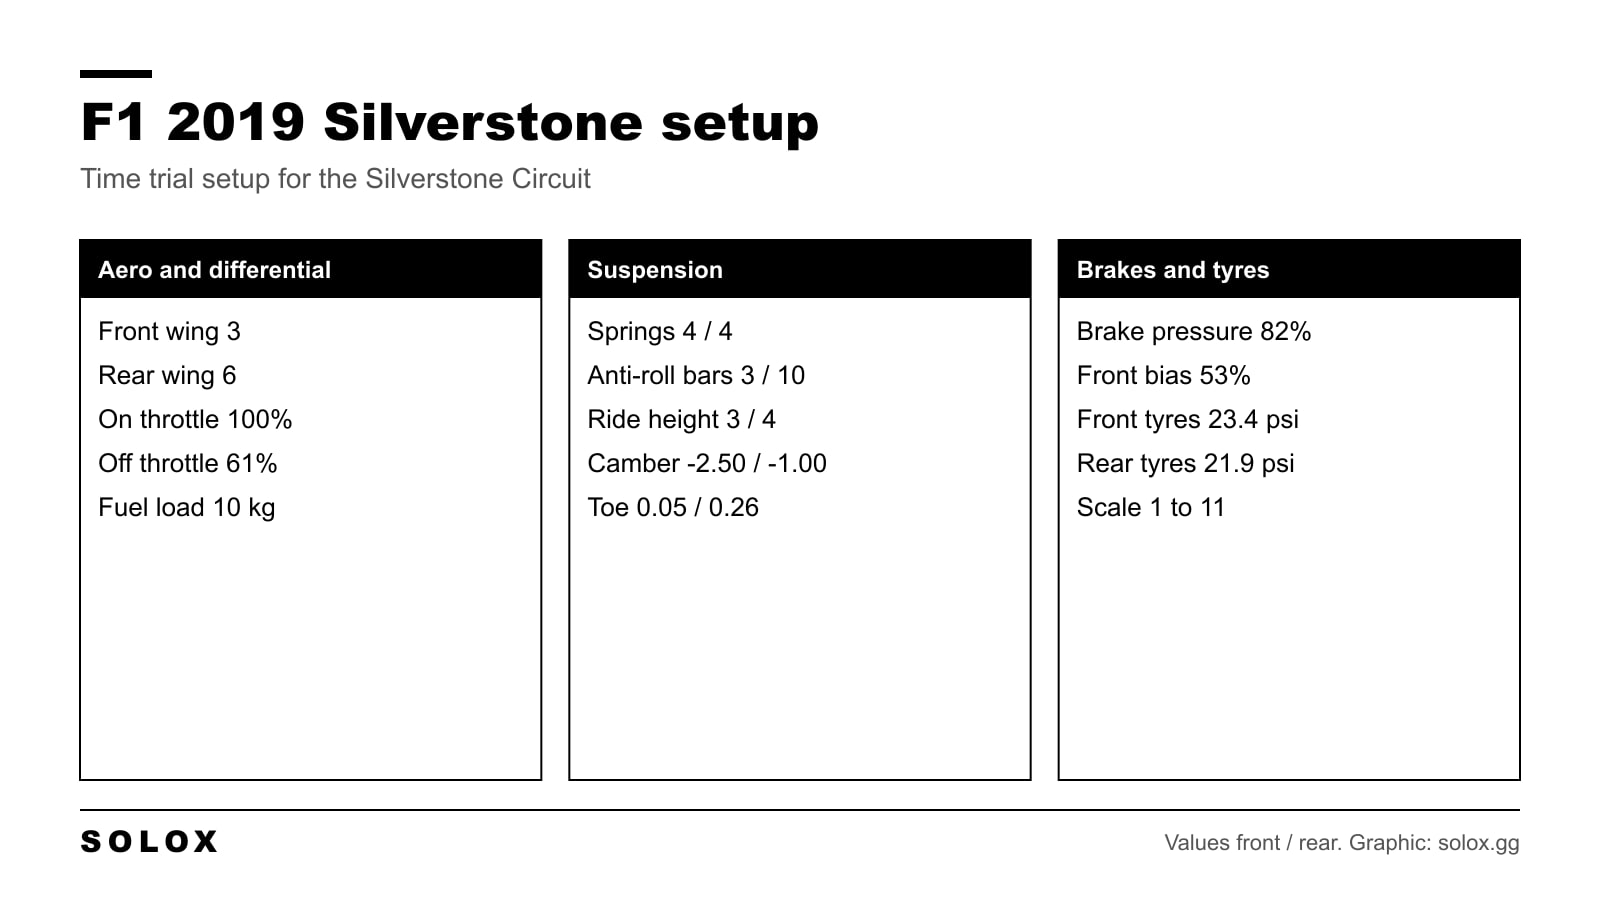
My F1 2019 Silverstone setup: wings 3 and 6, a fully locked differential, suspension, brakes and tyre pressures in one table, plus what to change for a race.
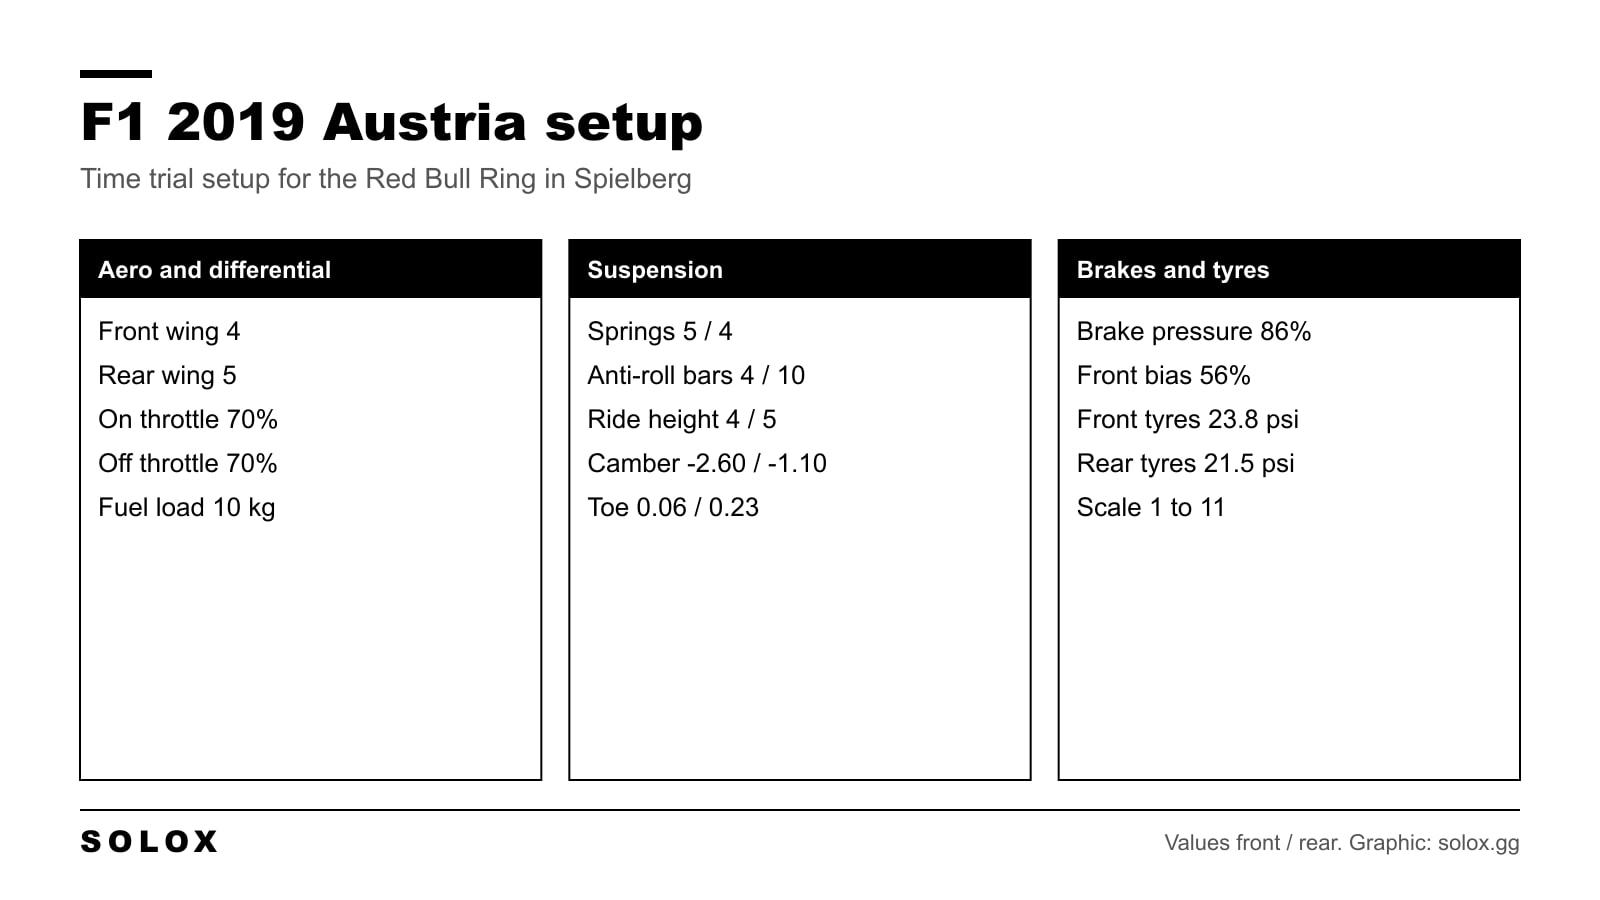
My F1 2019 Austria setup for the Red Bull Ring: wings 4 and 5, differential, suspension, brakes and tyre pressures in one table, plus race changes.
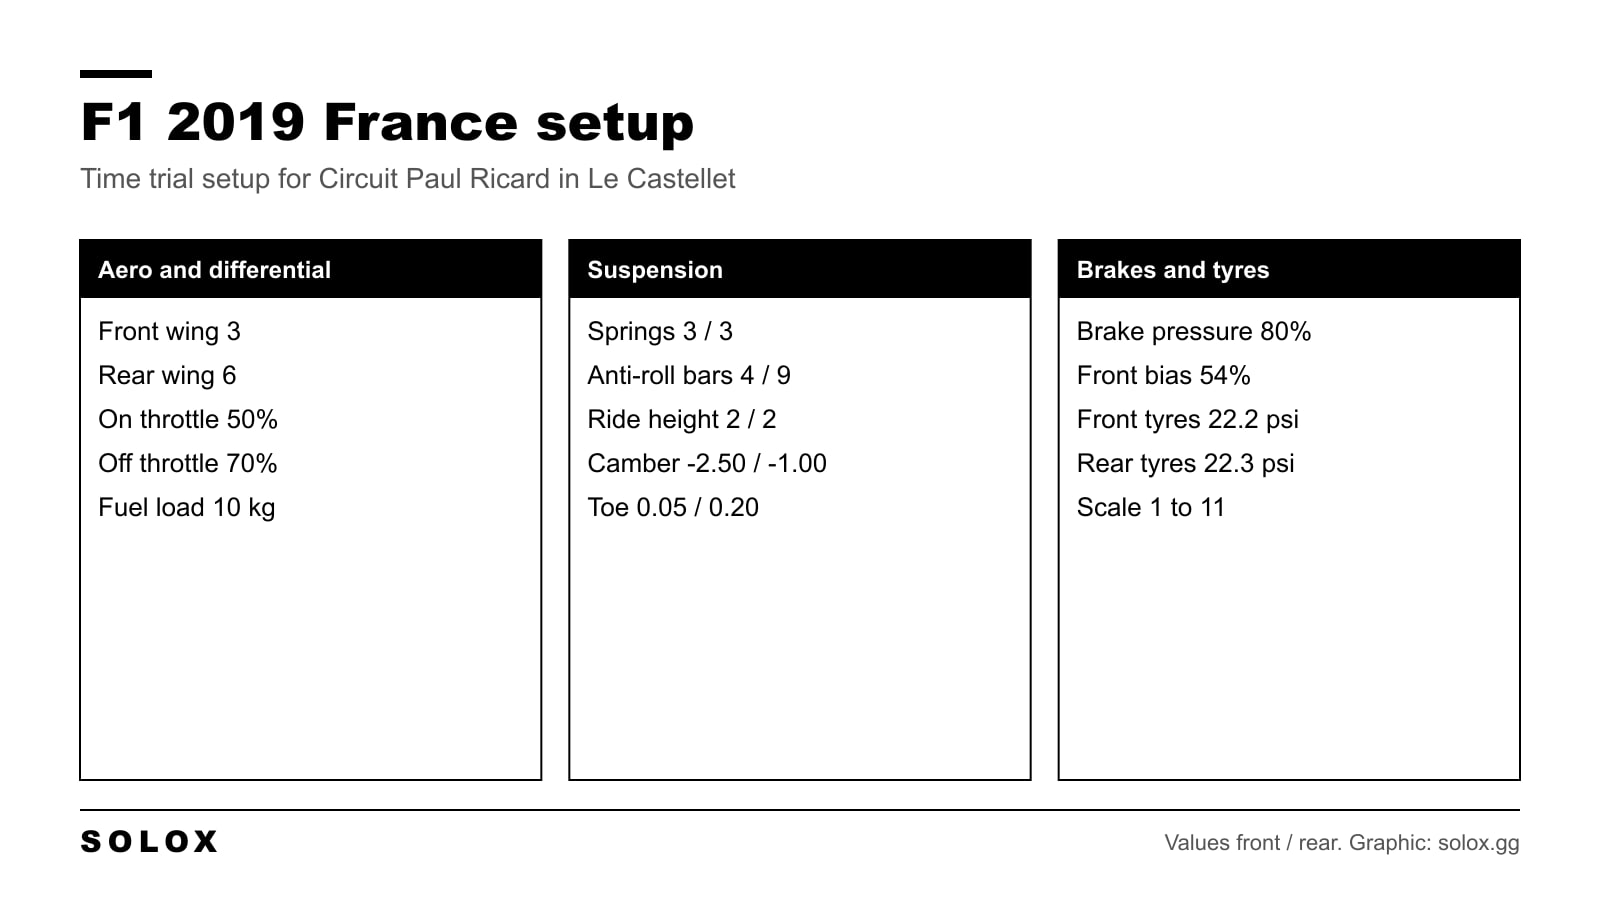
My F1 2019 France setup for Paul Ricard: wings 3 and 6, differential, suspension, brakes and tyre pressures in one table, plus what to change for a race.
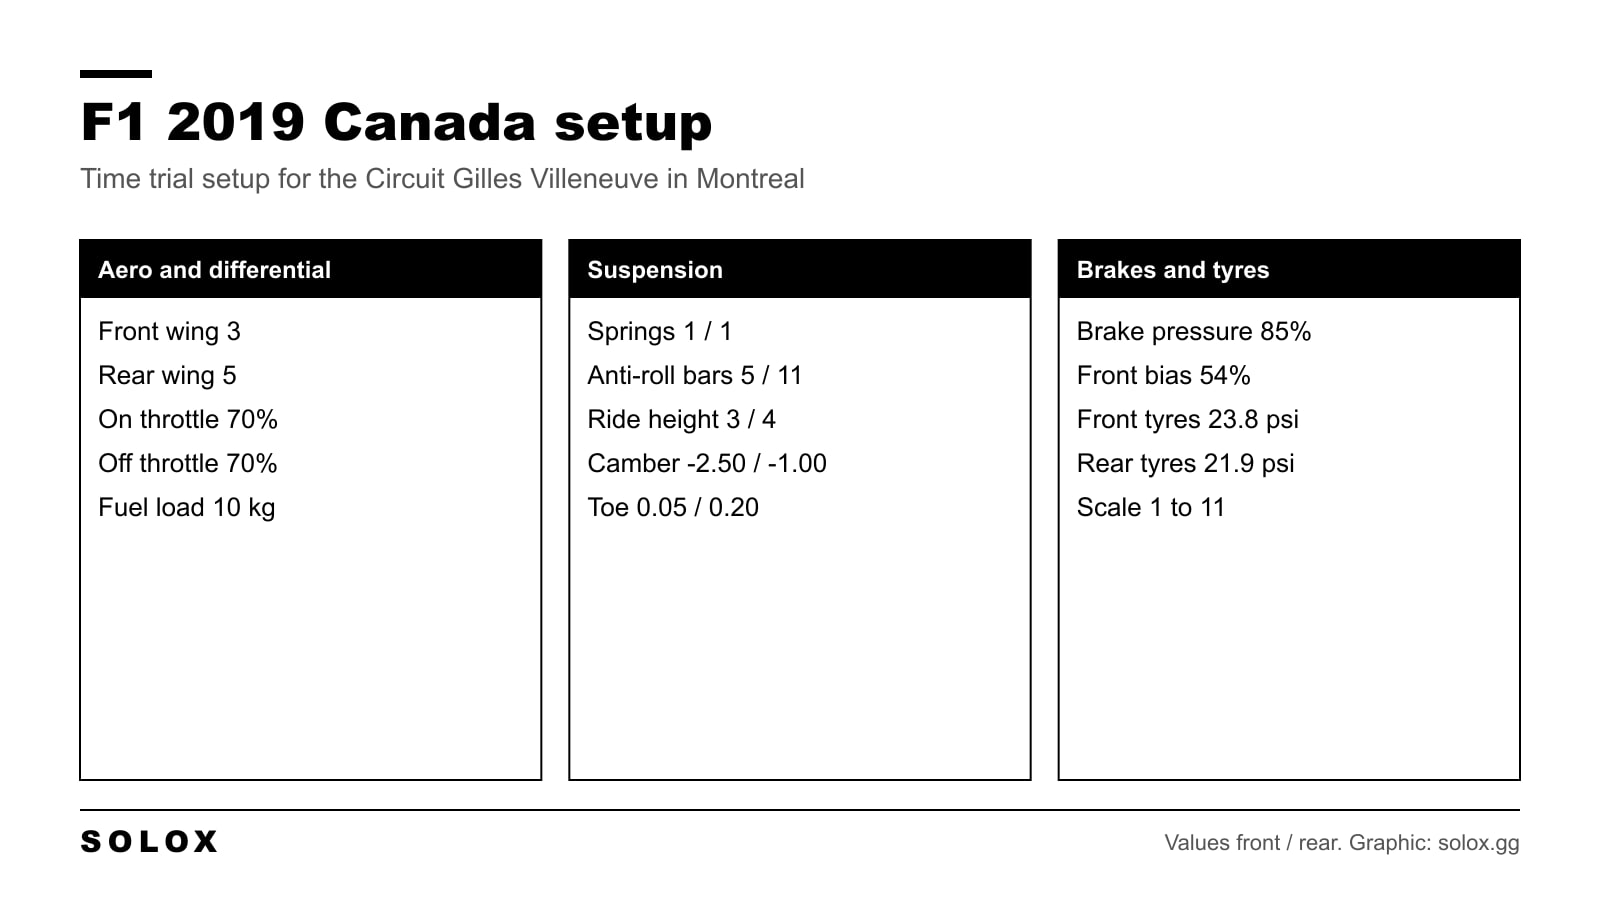
My F1 2019 Canada setup for Montreal: wings 3 and 5, differential, suspension, brakes and tyre pressures in one table, plus what to change for a race.
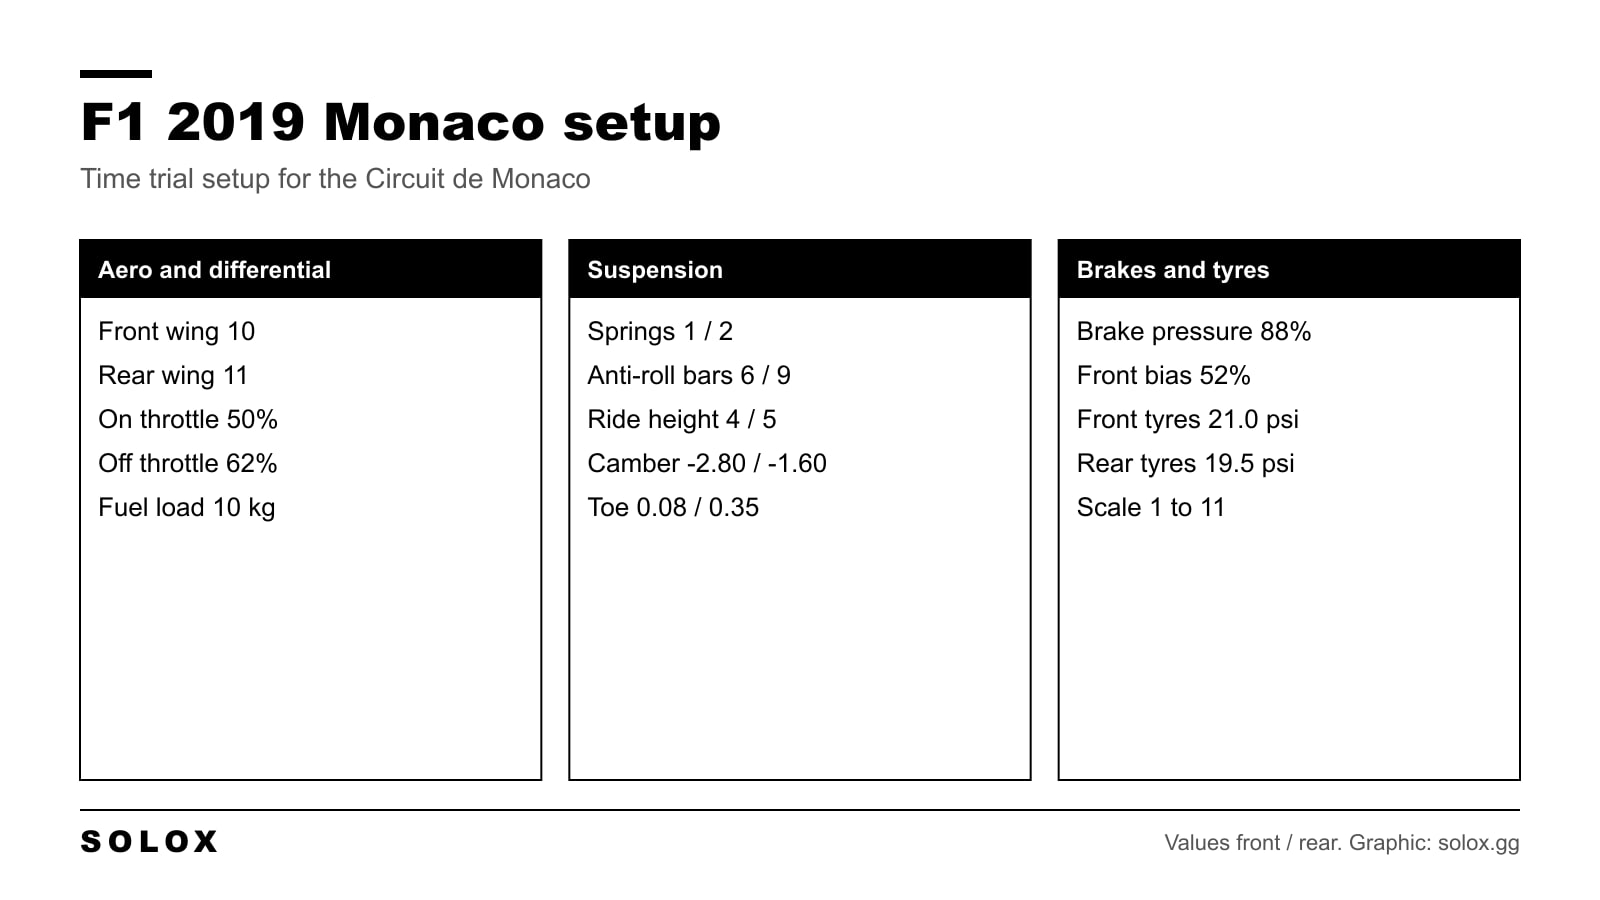
My F1 2019 Monaco setup: wings 10 and 11, differential, suspension, camber, brakes and tyre pressures in one table, plus what to change for a race.
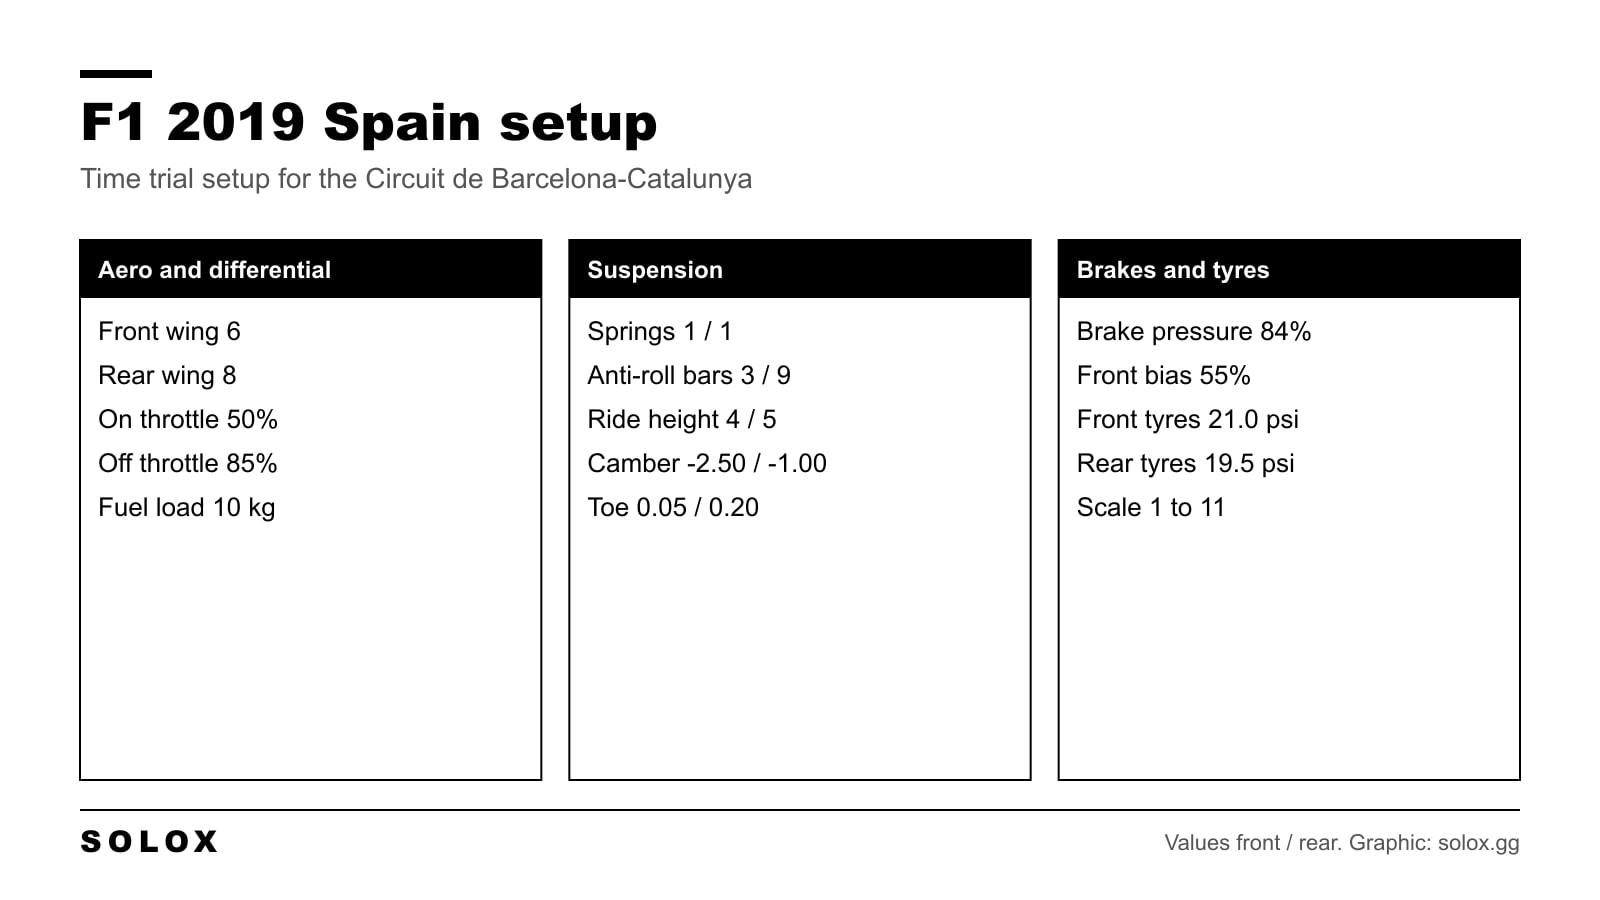
My F1 2019 Spain setup for Barcelona: wings 6 and 8, differential, suspension, brakes and tyre pressures in one table, plus what to change for a race.
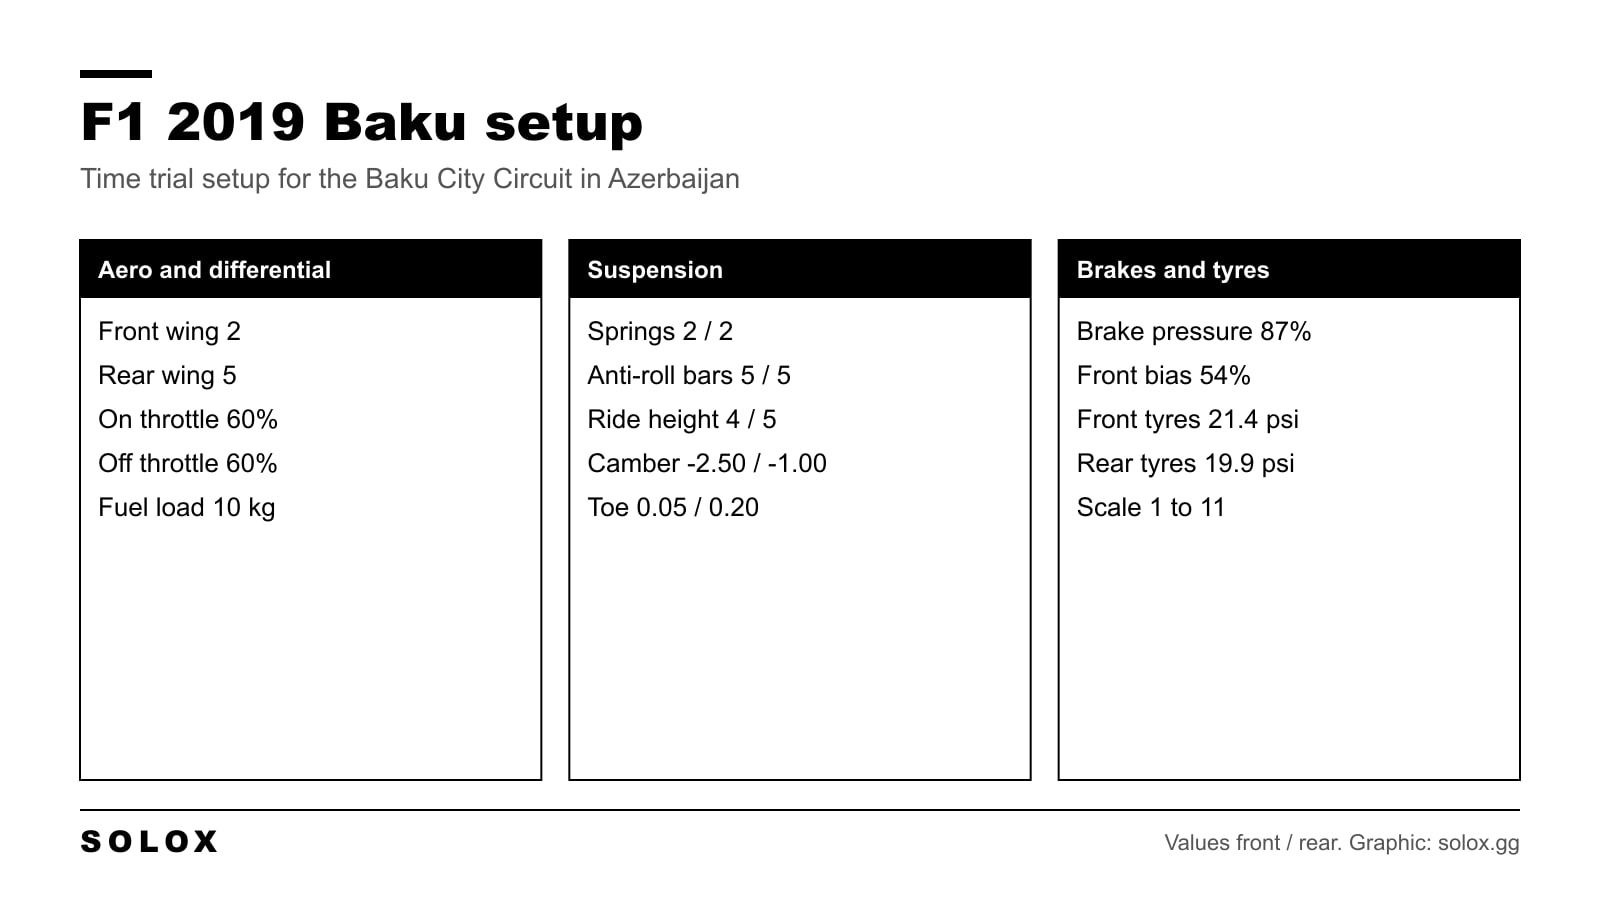
My F1 2019 Baku setup for Azerbaijan: wings 2 and 5, differential, suspension, brakes and tyre pressures in one table, plus what to change for a race.
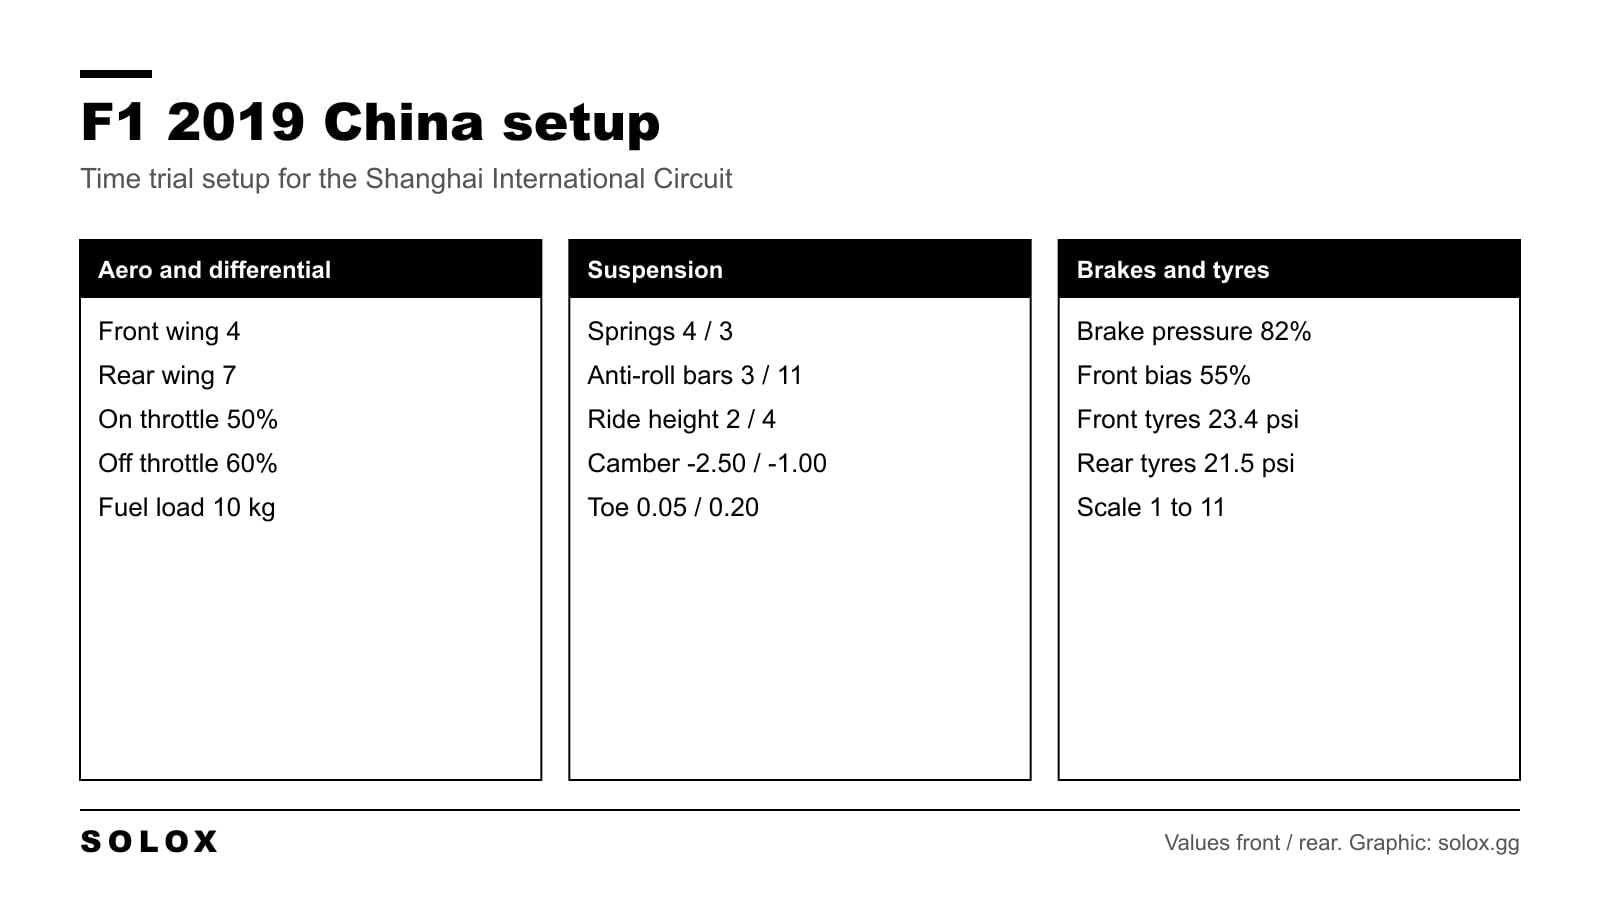
My F1 2019 China setup for Shanghai: wings 4 and 7, differential, suspension, brakes and tyre pressures in one table, plus what to change for a race.
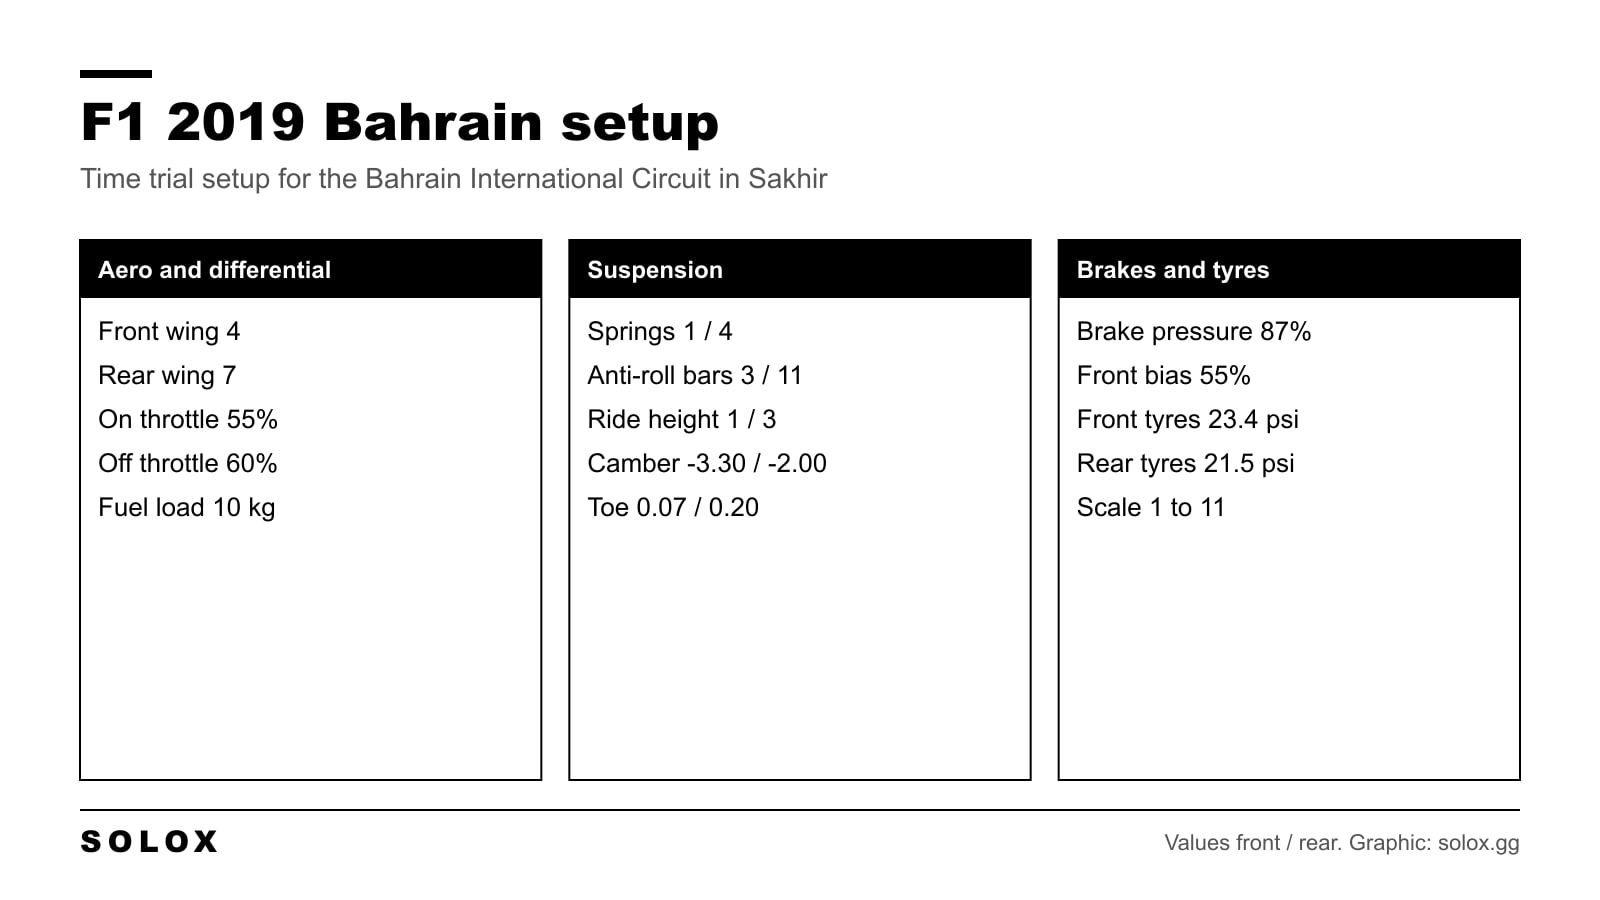
My F1 2019 Bahrain setup for Sakhir: wings 4 and 7, differential, suspension, brakes and tyre pressures in one table, plus what to change for a race.
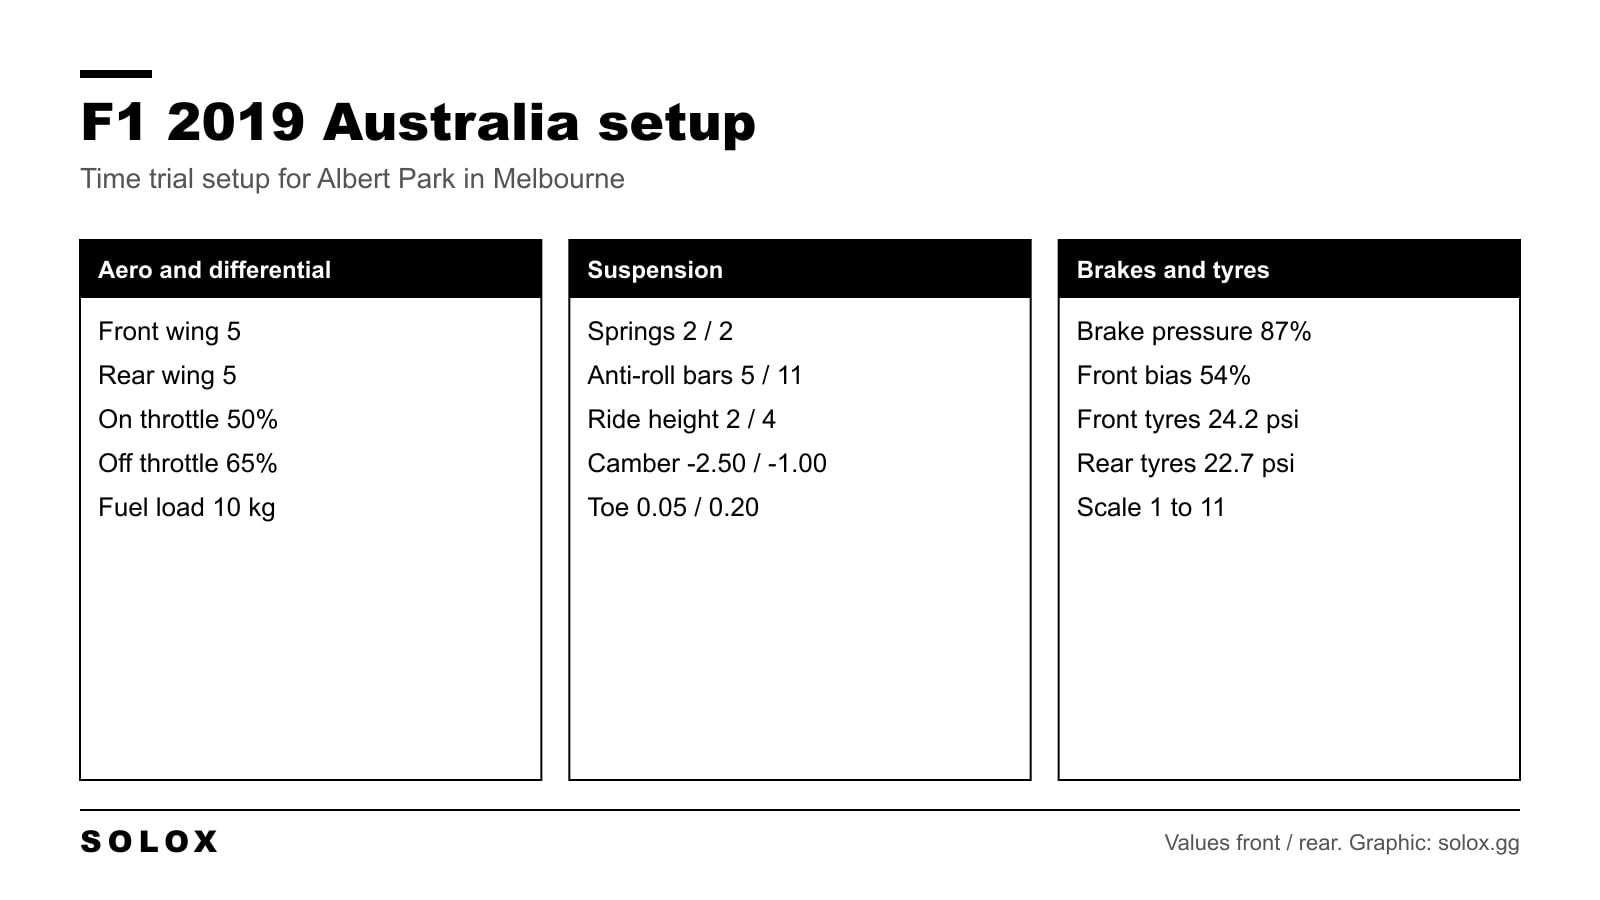
My F1 2019 Australia setup for Melbourne: wings 5 and 5, differential, suspension, brakes and tyre pressures in one table, plus what to change for a race.
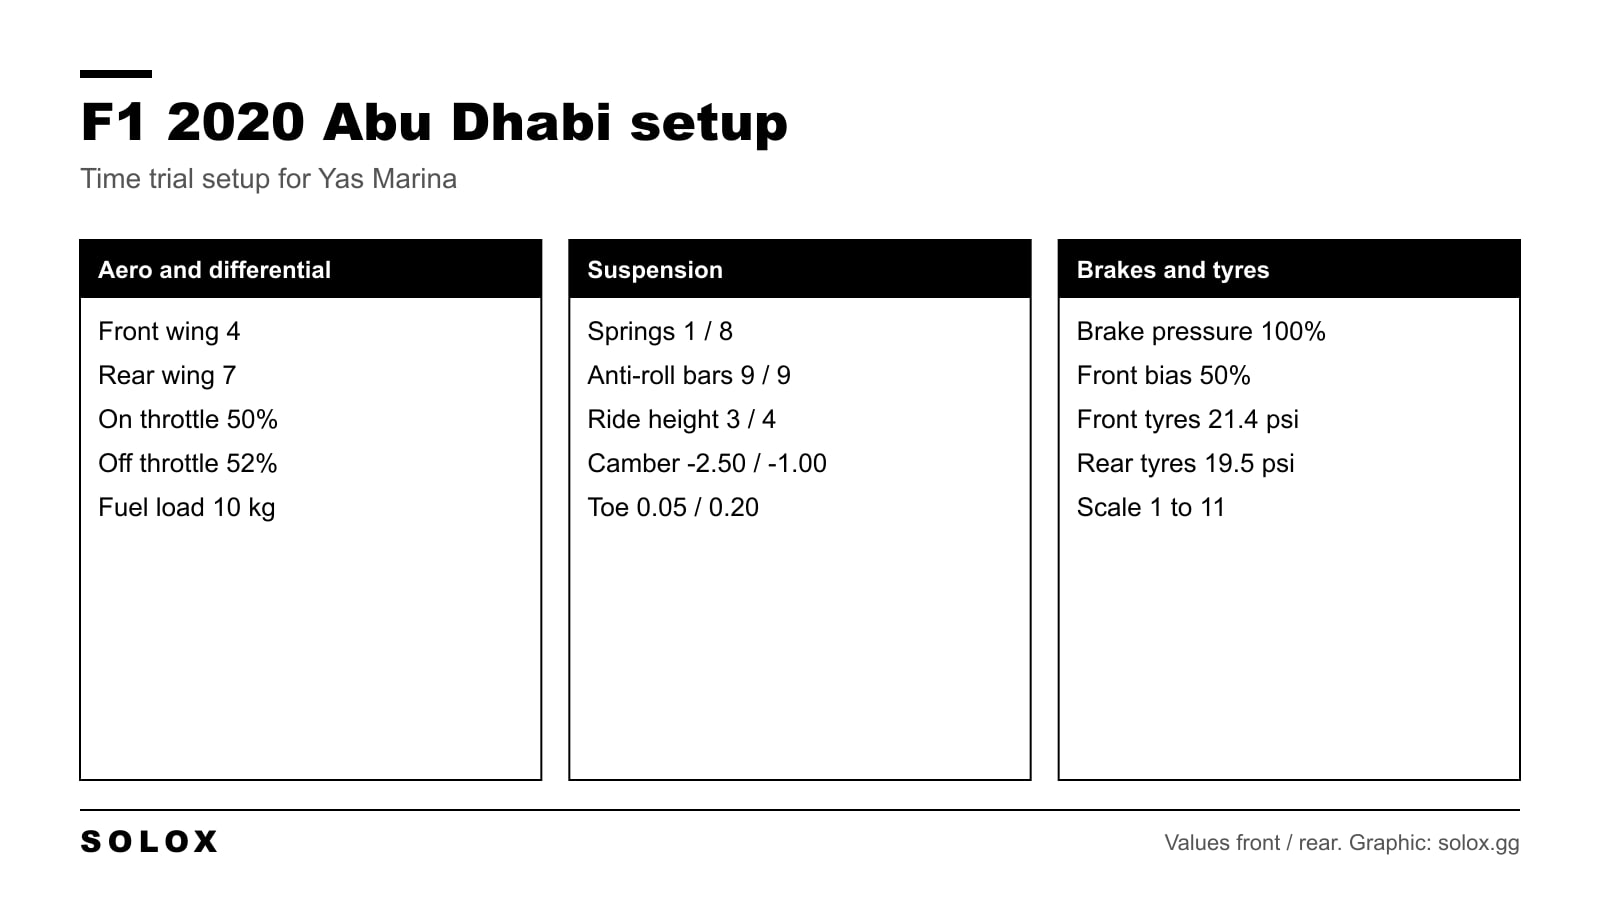
My F1 2020 Abu Dhabi setup for Yas Marina: wings 4 and 7, anti-roll bars 9 and 9, brakes and tyre pressures in a table, plus race changes and a corner guide.
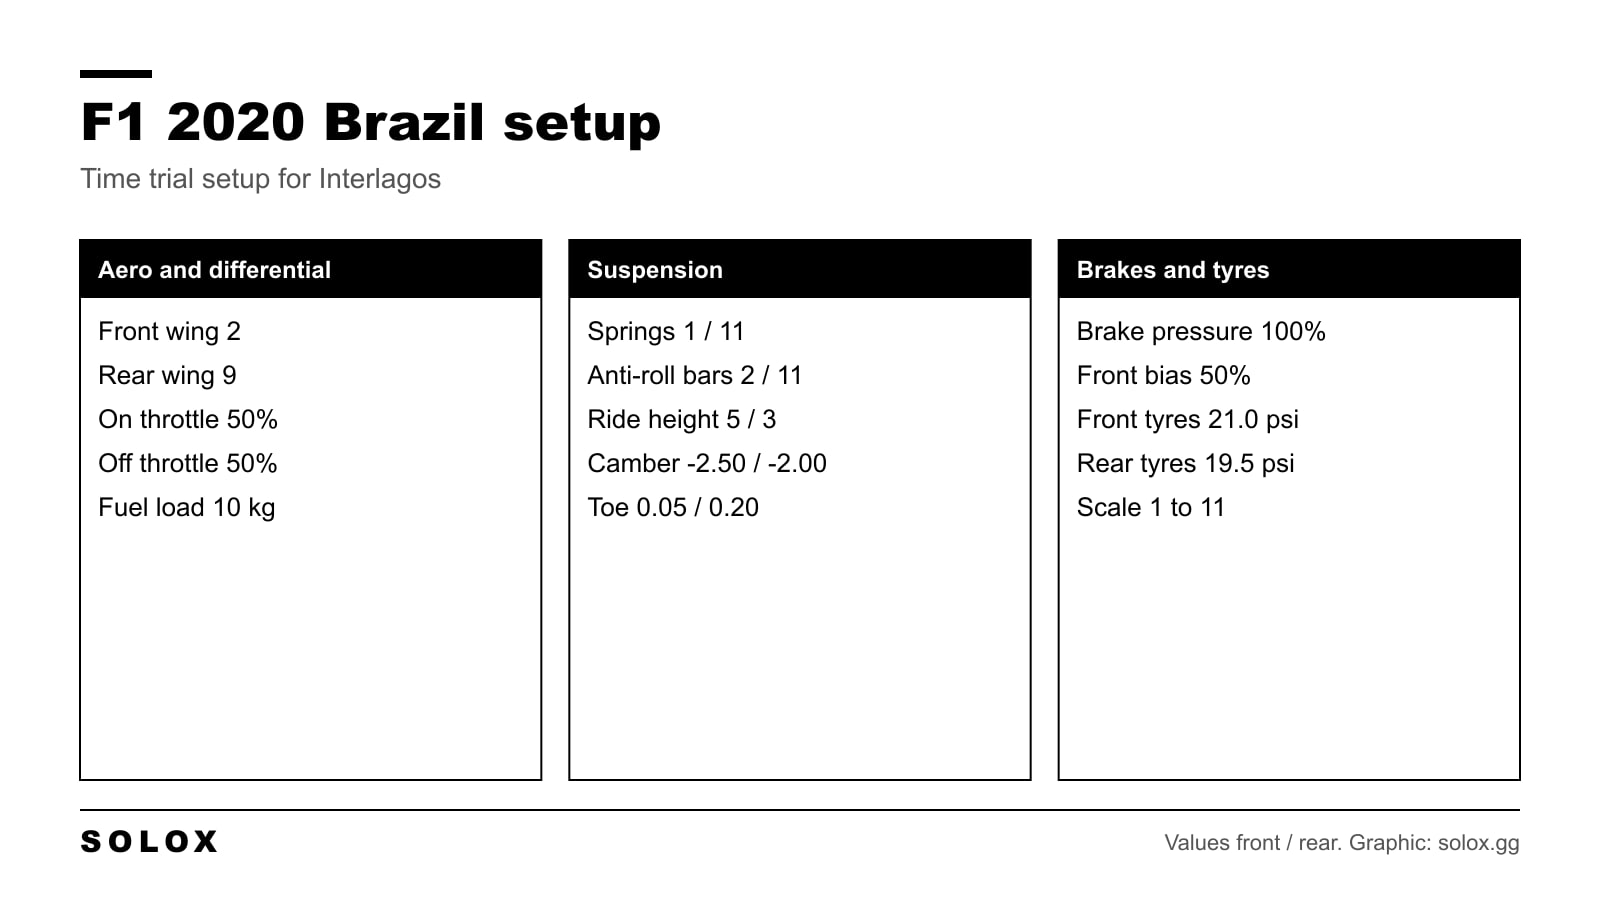
My F1 2020 Brazil setup for Interlagos: wings 2 and 9, rear springs and bar at 11, brakes and tyre pressures in a table, plus race changes and a corner guide.
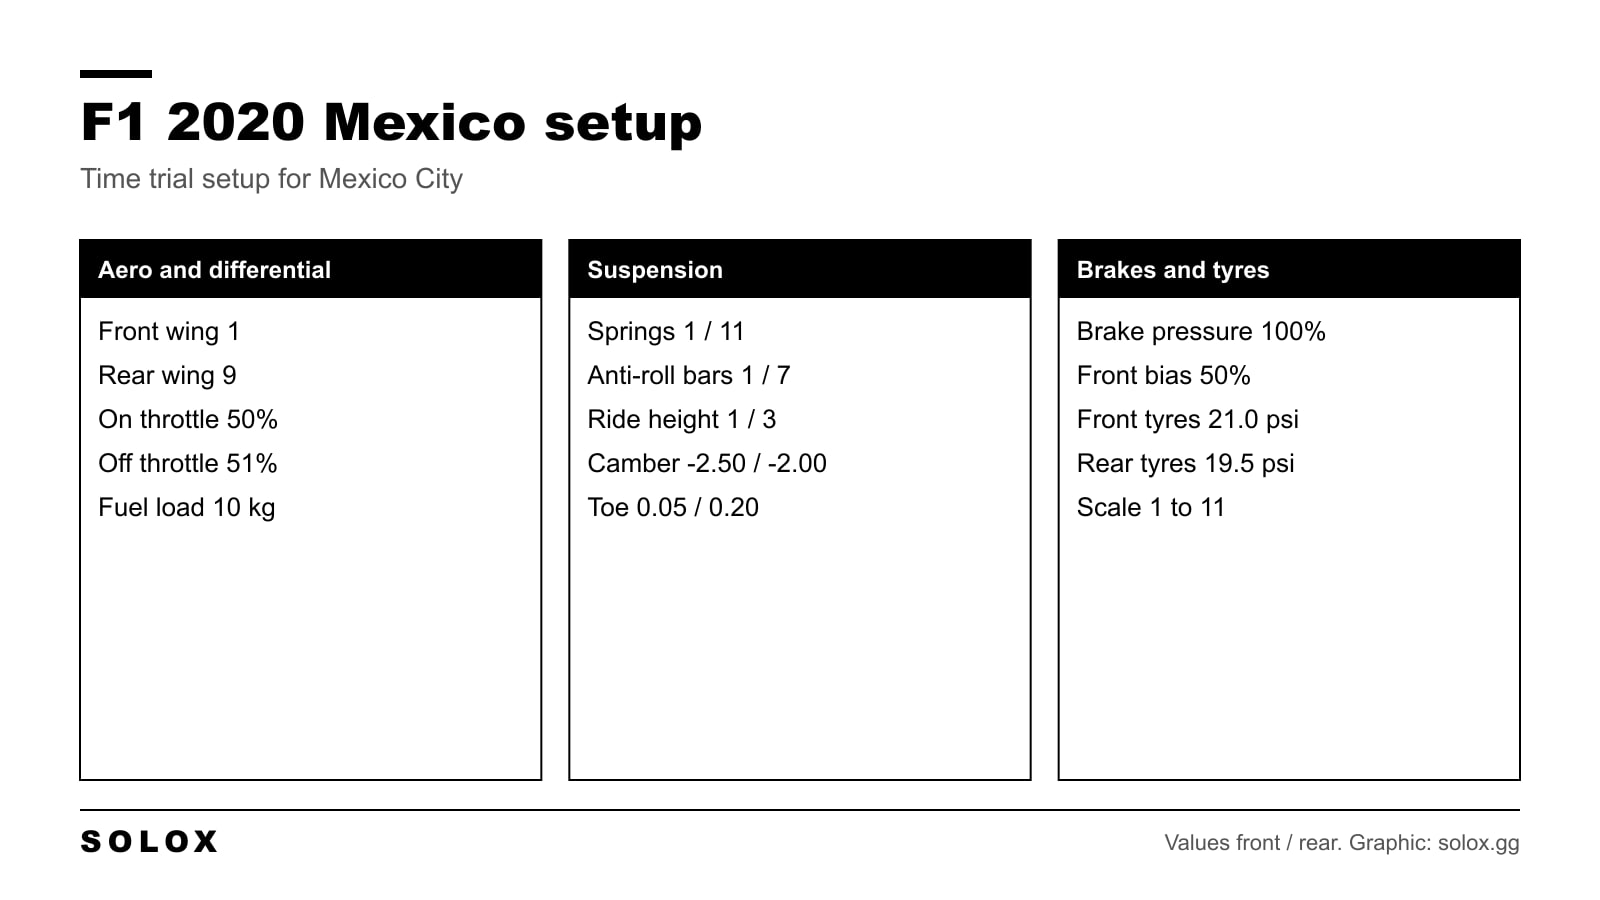
My F1 2020 Mexico setup for Mexico City: wings 1 and 9, rear springs at 11, brakes and tyre pressures in a table, plus race changes and a corner guide.
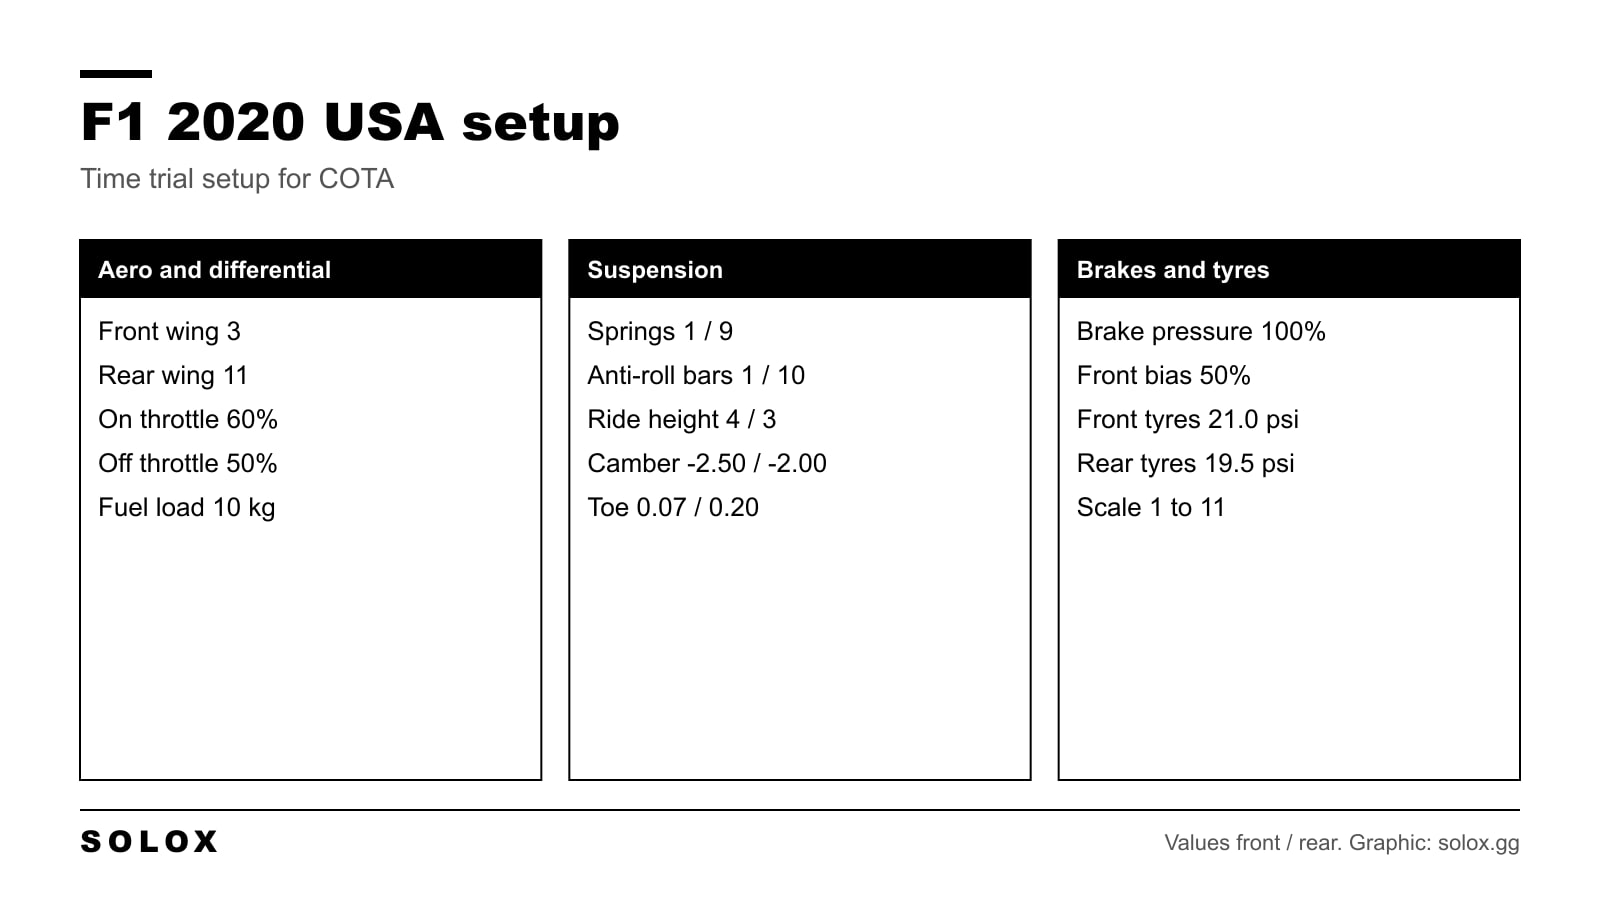
My F1 2020 USA setup for Austin: wings 3 and 11, a 60% differential, brakes and tyre pressures in a table, plus race changes and a corner guide.
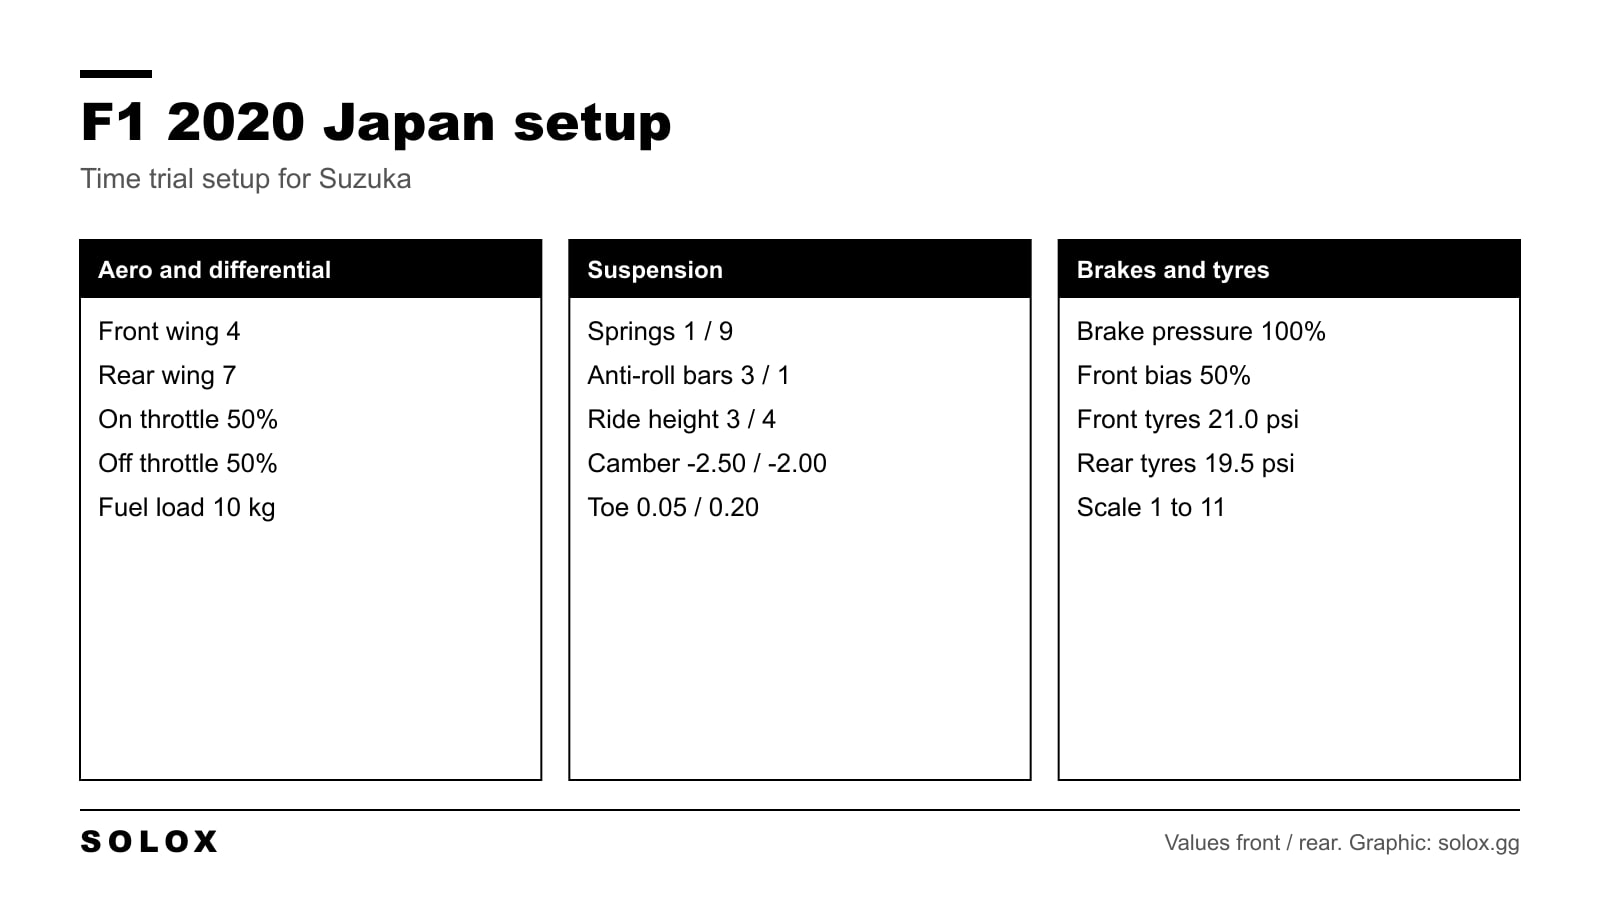
My F1 2020 Japan setup for Suzuka: wings 4 and 7, a very soft rear bar, brakes and tyre pressures in a table, plus race changes and a corner guide.